SharePoint Online is a cloud-based service that helps organizations share and collaborate with colleagues, partners, and customers. With SharePoint Online, you can access internal sites, documents, and other information from anywhere-at the office, at home, or from a mobile device.
Salesforce.com is a cloud-based customer relationship management (CRM) software solution for sales, service, marketing, analytics, and building a customized application.
Integration of SharePoint with Salesforce enables organizations to sync their data on Salesforce CRM which directly helps to access these data on single technology instead of using both, therefore saves time.
Also check: How to Integrate Salesforce and NetSuite Effectively?
Here is detail analysis of steps on how this integration is performed with respective screenshots.
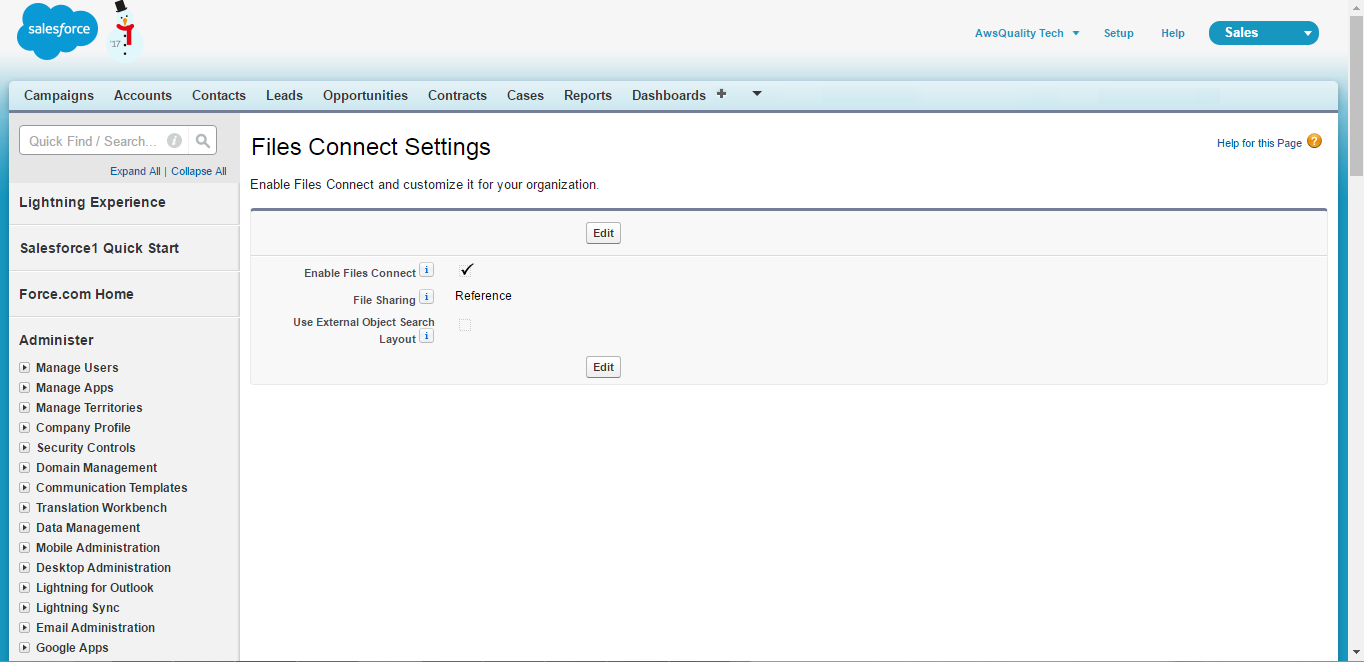
Enable File Connect in Salesforce:
- In Setup, enter File Connect in the Quick Find box then select File Connect.
- Click on Edit.
- Does Enable File Connect Checkbox True.
- File sharing mode should be Reference.
- Click on Save.
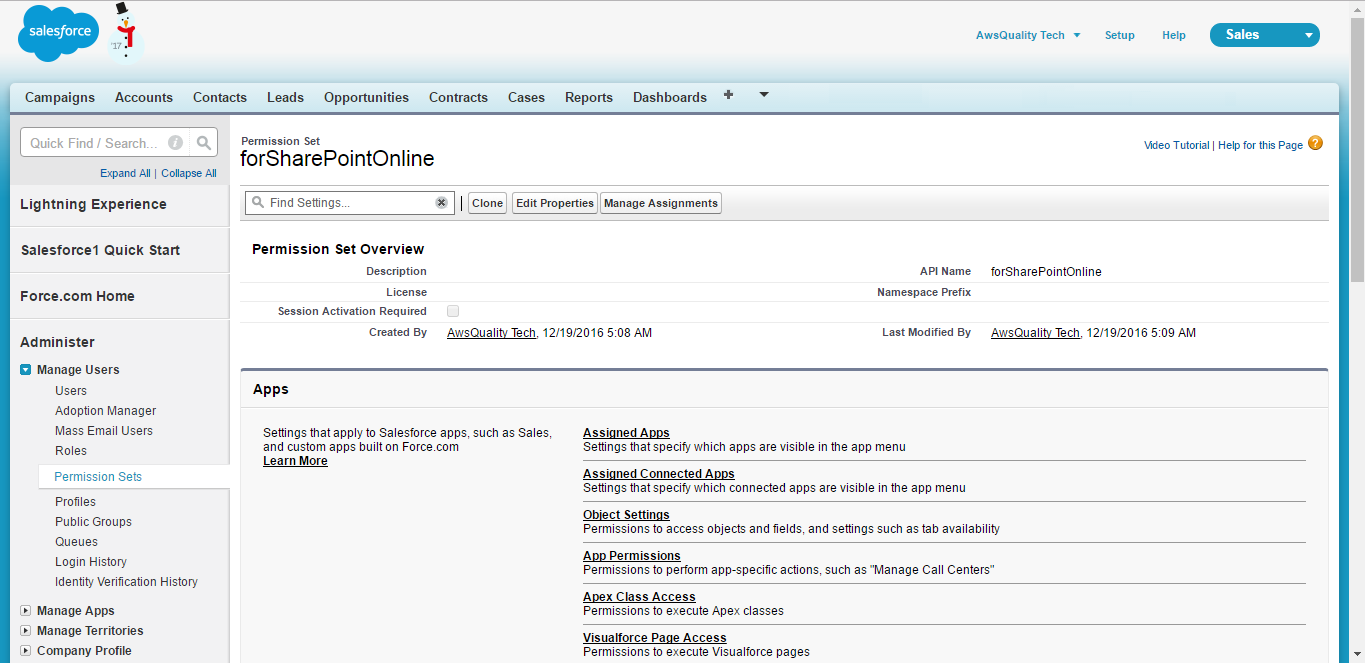
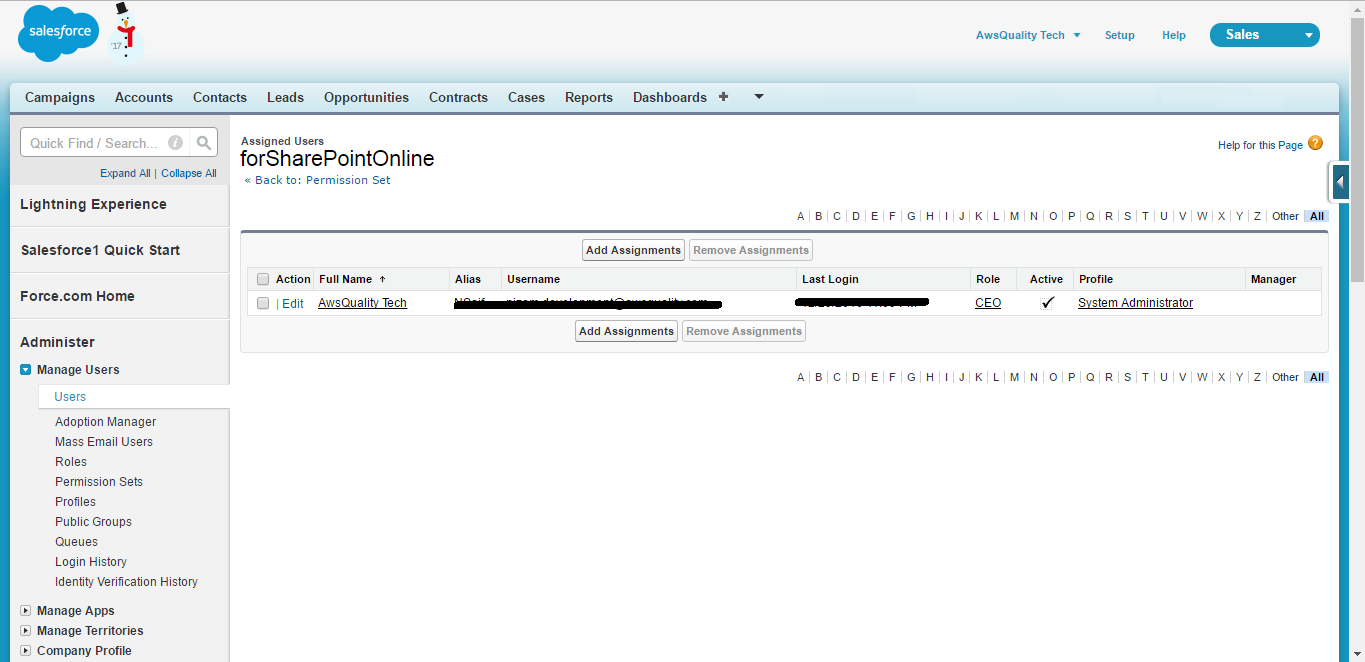
Create a Permission Set to allow user for File Connect Cloud access (User should be allowed for File Connect Access) :
- In Setup, enter Permission Set in the Quick Find box then select Permission Set under Manage Users.
- Enter Label name for Permission Set.
- API name will be auto filled.
- Check User License should be ‘None’.
- Click on Save.
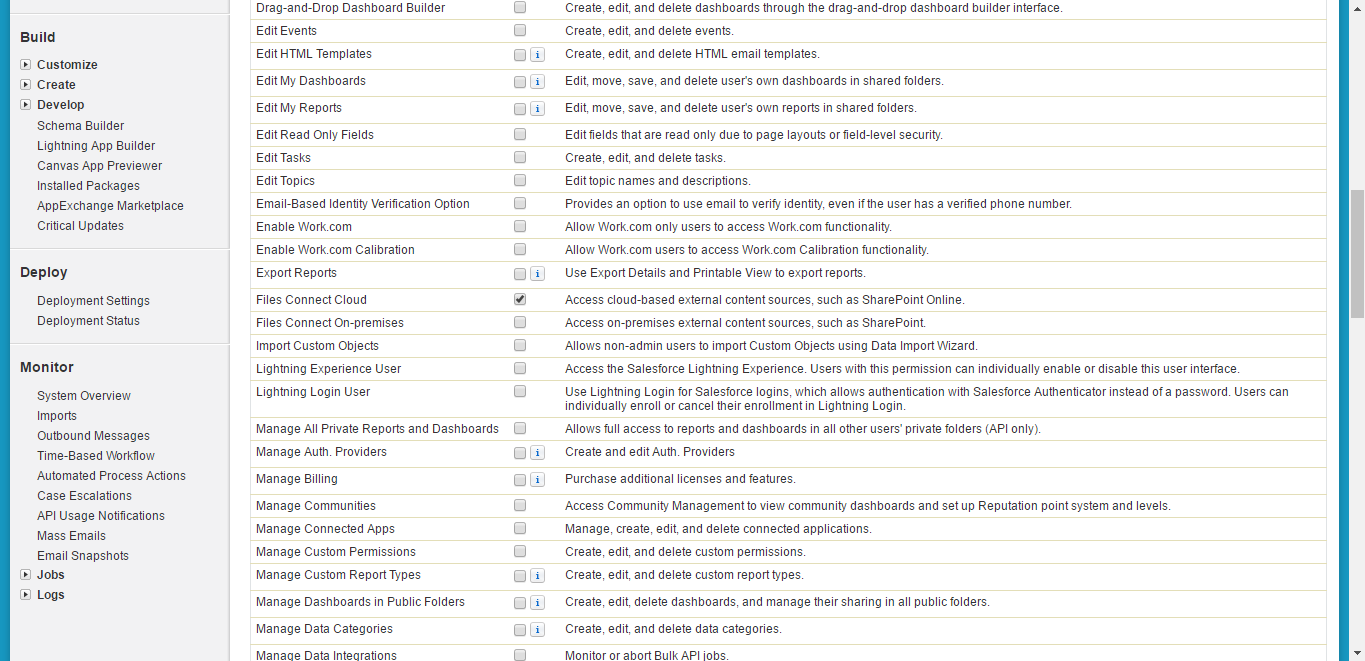
2. Now go to on ‘System Permissions’ under System Section after permission Set Saved.
- Click on Edit.
- Check ‘File Connect Cloud’ checkbox True under System Permission Name.
- Click on Save.
3. Now go to ‘Manage Assignments’ to assign the Permission Set
- Click on Add Assignments button.
- Click Checkbox true before a user name to assign the permission set.
- Click on Checkbox before a user name under Action to assign the permission set.
- Now click on Assign button.
- Click on Done.
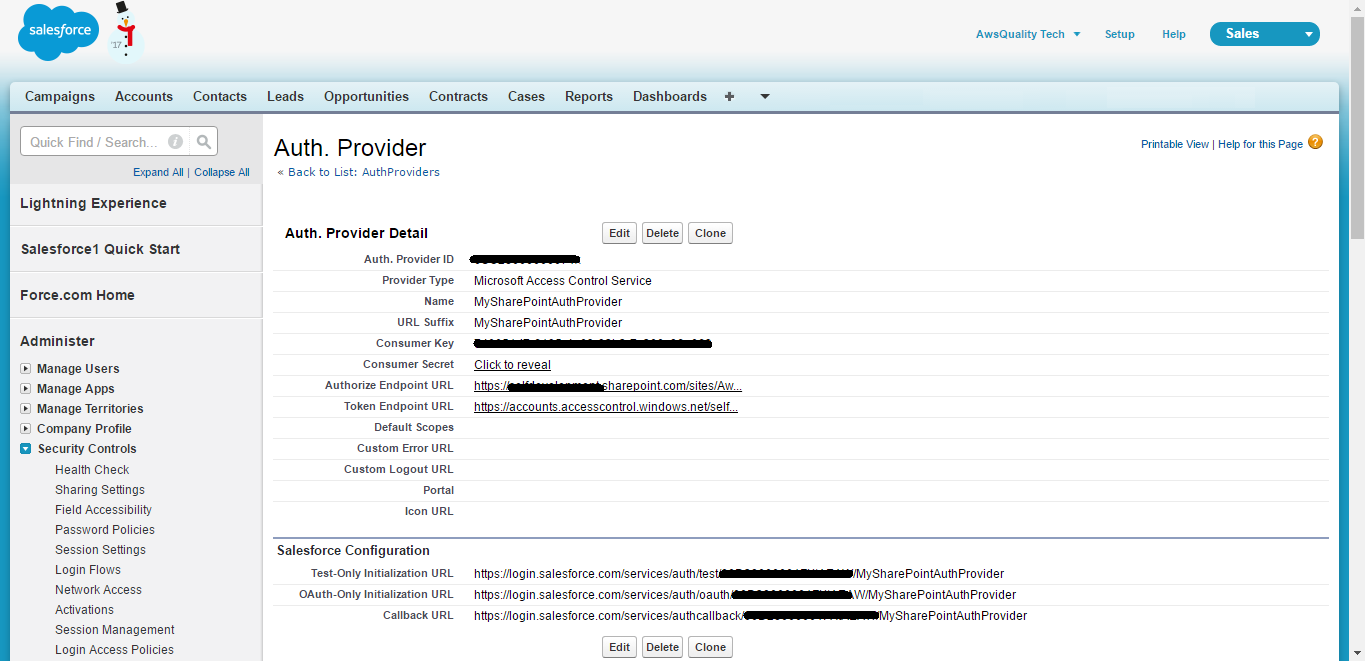
Create an Authentication Provider Using Placeholder Values
- In Setup, enter Auth. Providers in the Quick Find box, and then select Providers.
- Click New.
- For Provider Type, select Microsoft Access Control Service, and then set the following options.
- Name—enter the name you want to appear in Salesforce.
- URL Suffix—Enter a suffix you want to appear at the end of the URL path. By default, the suffix reflects the Name entry.
- Consumer Key—Enter a placeholder value.
- Consumer Secret—Enter a placeholder value.
- Authorize Endpoint URL—enter a placeholder that begins with https.
- Token Endpoint URL—enter a placeholder that begins with https.
- Default Scopes—Leave empty.
- Click Save. Then, at the bottom of the Auth. Provider detail page, copy the Callback URL entry to a text file. (You use this when registering an Office 365 app.)
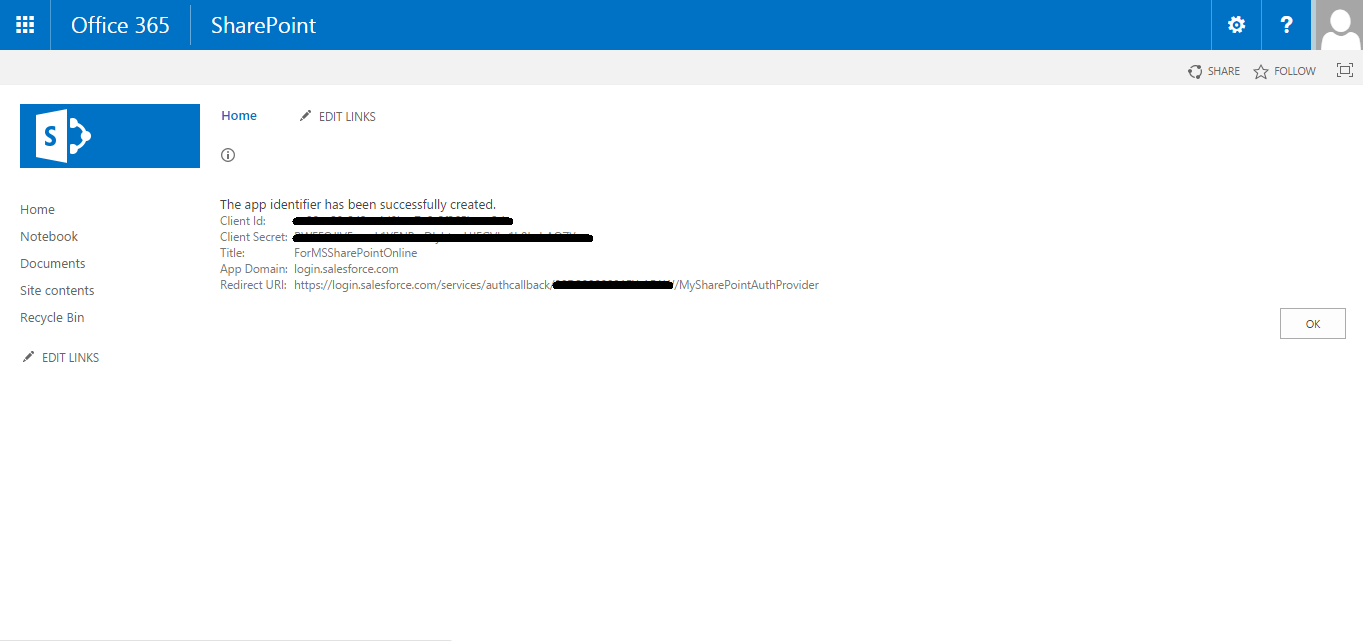
Register an Office 365 App
- Log in to your Office365 account as an administrator, and go to the following URL: https://your company name.sharepoint.com/site collection path/_layouts/15/appregnew.aspx
- Set the following options.
- Client Id—Click Generate, and copy the generated value to a text file.
- Client Secret—Click Generate, and copy the generated value to a text file.
- Title—enter a name for the app.
- App Domain—Enter the domain name of your Salesforce org. such as login.salesforce.com.
- Redirect URL— Enter the Callback URL you copied when creating the Authentication Provider in Salesforce.
- Click Create
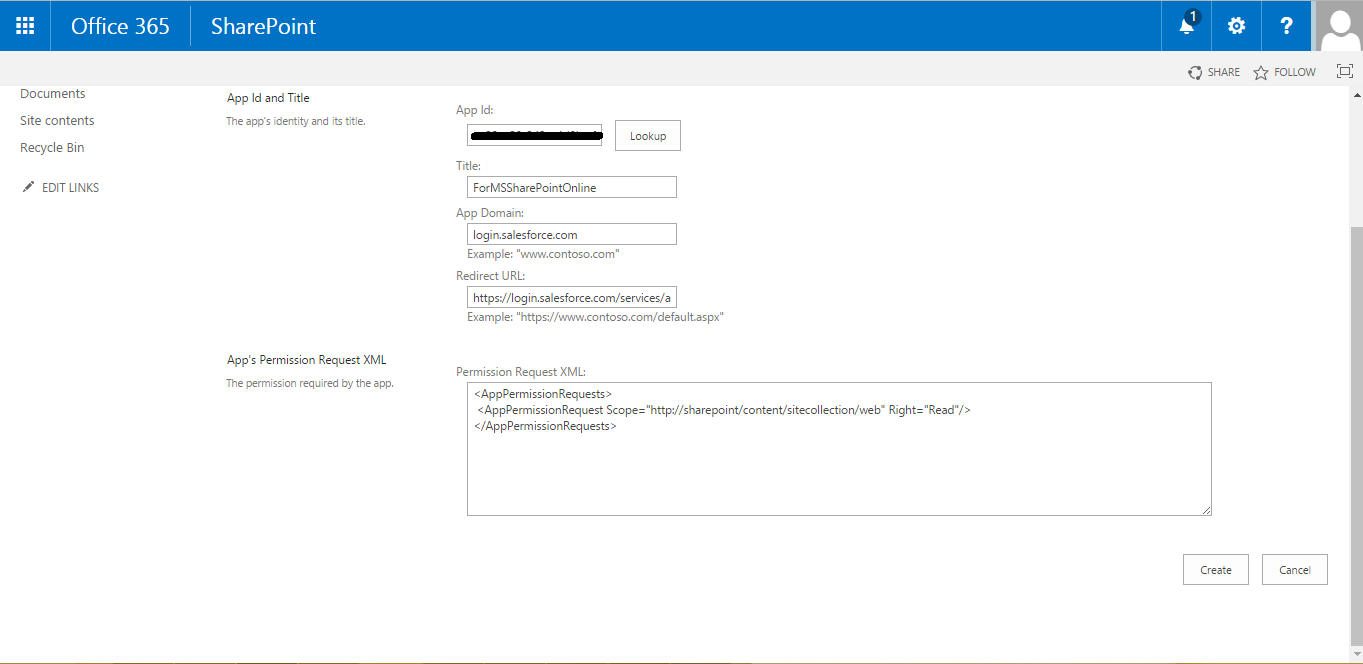
Now you configure the newly created app to access SharePoint resources.
- Go to one of the following URL: https://your company name.sharepoint.com/site collection path/_layouts/15/appinv.aspx
- Set the following options.
- App Id—enter the Client Id you copied to a text file, then click Lookup.
- Title—keep the default value.
- App Domain—keep the default value.
- Redirect URL—keep the default value.
- Permission Request XML—enter a string with this format.
<AppPermissionRequests>
<AppPermissionRequest Scope=”[SCOPE]” Right=”[PLACEHOLDER]”/>
</AppPermissionRequests>
- For SharePoint Online, replace [SCOPE] with one of these values.
- http://sharepoint/content/sitecollection/web to let users access a single site (but not its subsites).
- http://sharepoint/content/sitecollection to let users access a single site collection (including all subsites).
- http://sharepoint/content/tenant to let users access all site collections.
- Replace [PLACEHOLDER] with one of these values:
- Read
- Write
- Manage
- Full Control
- Click Create
Edit the Authentication Provider in Salesforce:
In Salesforce, replace the original placeholder values with the correct ones from the Office 365 app.
- In Setup, enter Auth. Providers in the Quick Find box, and then select Providers.
- Click Edit next to the authentication provider you created previously.
- Change the following values:
- Consumer Key—enter the Client Id you copied to a text file.
- Consumer Secret—enter the Client Secret you copied to a text file.
- Authorize Endpoint URL—enter the URL of the OAuthAuthorize.aspx page in Office 365. The URL format is as follows.
SharePoint Online
https://your company name.sharepoint.com/site collection path/_layouts/15/OauthAuthorize.aspx
- Token Endpoint URL— enter a URL in the following format.
SharePoint Online
https://accounts.accesscontrol.windows.net/[your company name].onmicrosoft.com/tokens/OAuth/2?resource=00000003-0000-0ff1-ce00-000000000000/[your company name].sharepoint.com@[your company name].onmicrosoft.com
- Click Save. Your authentication provider is now ready for use.
Now integration with SharePoint is completed.
If you are looking for Salesforce integration partner, contact us and get a free quote.
