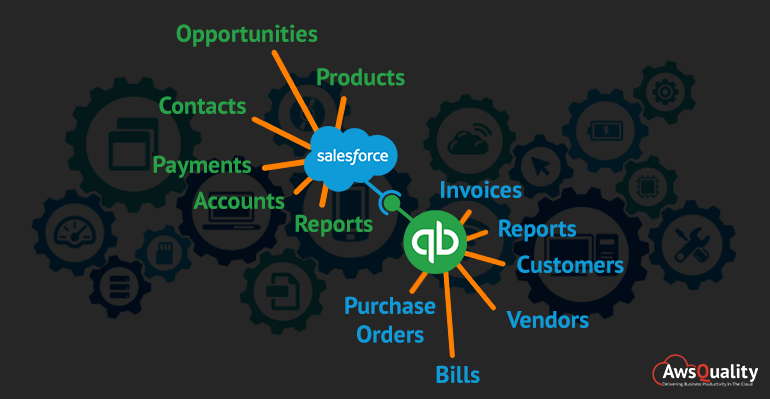
DBSync’s Salesforce– Salesforce data such as Product, Accounts, and Opportunites can easily synchronize with the help of QuickBooks Desktop Integration. This integration optimizes your Order-to-Cash and Procure-to-Pay processes and saves your lot of time and money.
Also Check: Salesforce and Quickbooks Online Integration Using DBSync
QuickBooks Desktop is one-time purchase software that can be installed on your Desktop or a laptop computer. Integrating Quickbooks with Salesforce allows financial data to share with the sales team. By connecting with QuickBooks you can view customer information, track expenses, customer reports and gain insights so you can easily predict.
Here are the basic requirements:
- Salesforce Account.
- Quickbooks Desktop (https://downloads.quickbooks.com/app/qbdt/products)
must be installed. - DBSync Account (https://www.mydbsync.com/).
- DBSync package installed from Appexchange https://appexchange.salesforce.com/appxListingDetail?listingId=a0N300000016bTHEAY.
Steps for Integration are listed below:-
- Download and Install Quickbooks Desktop Pro from the official website of Quickbook (https://downloads.quickbooks.com/app/qbdt/products).
- Open “https://www.mydbsync.com” and click to My Account -> Customer Login.
- Click on “Create An Account”.
- Go to the “Template Library” Tab and then click the link: “SalesforceQuickBooks: BiDirectional.”
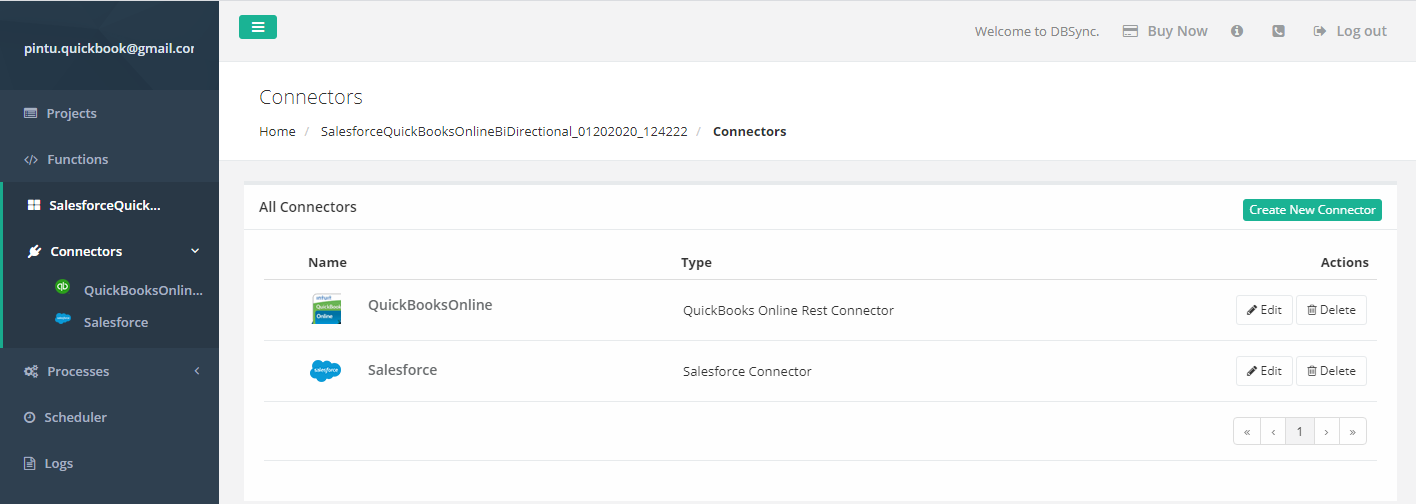
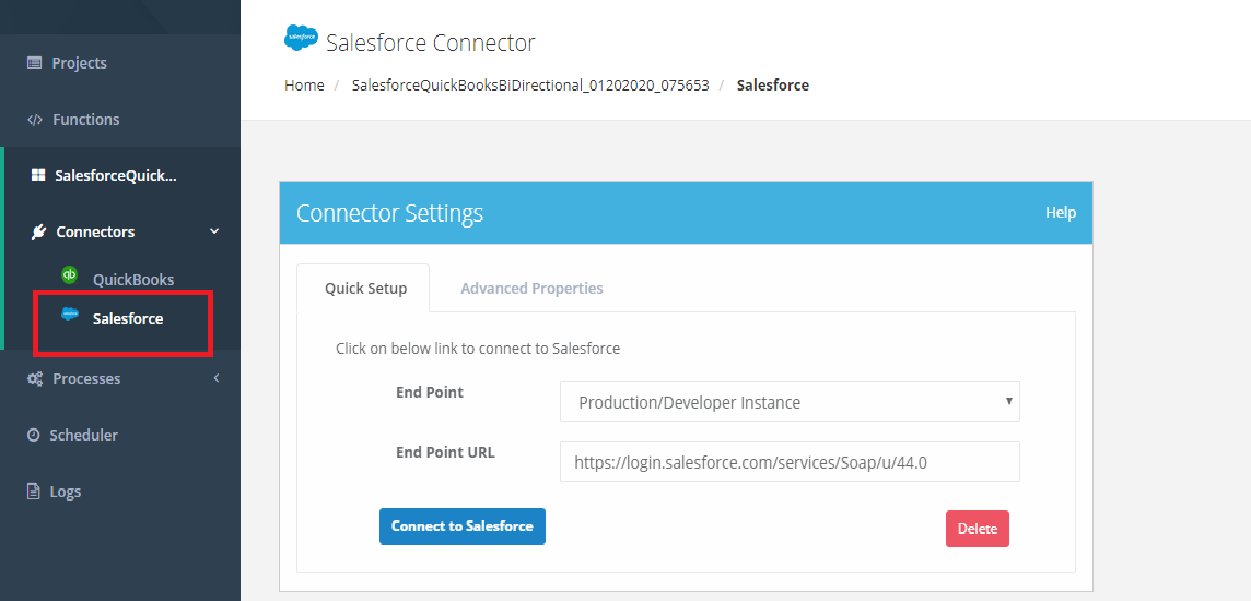
- From Connectors, we will get this screen for Quickbooks and Salesforce connection.
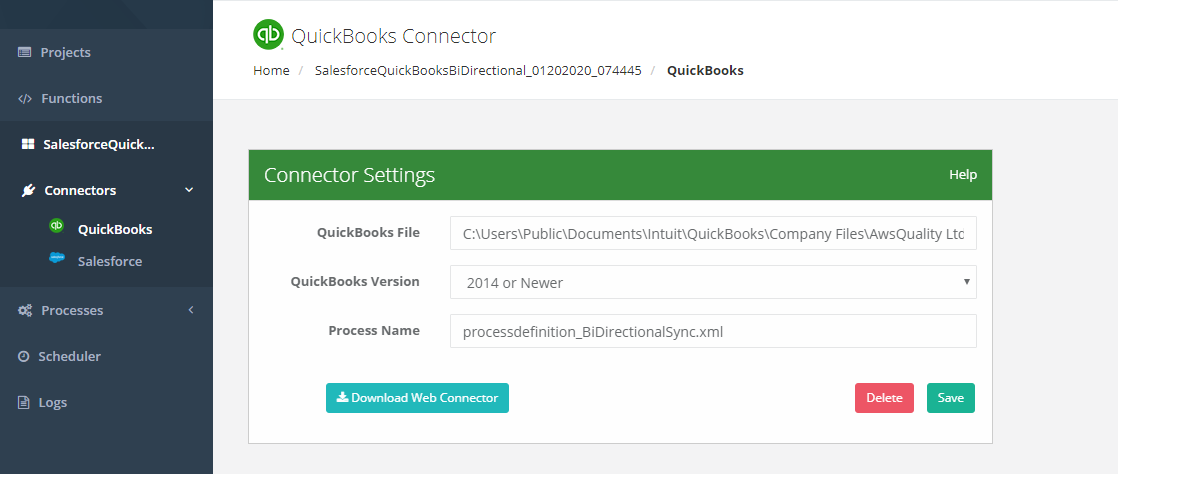
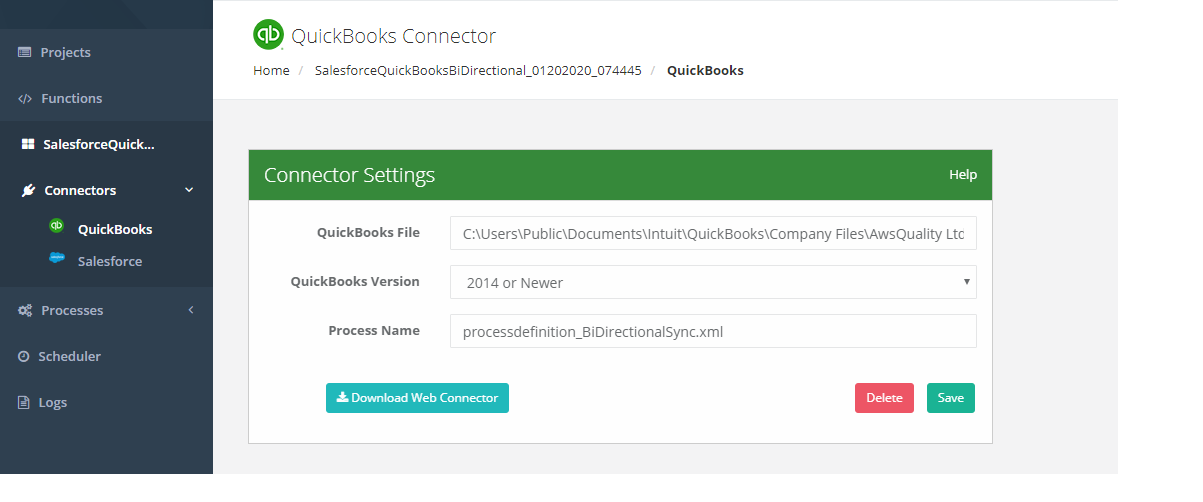
- From Connectors, click on QuickBooks. Fill details and click on Save Button.
- As you get Saved Successfully message. Click on Download Web Connector Button.
- Now download Quickbooks Web Connector for desktop from
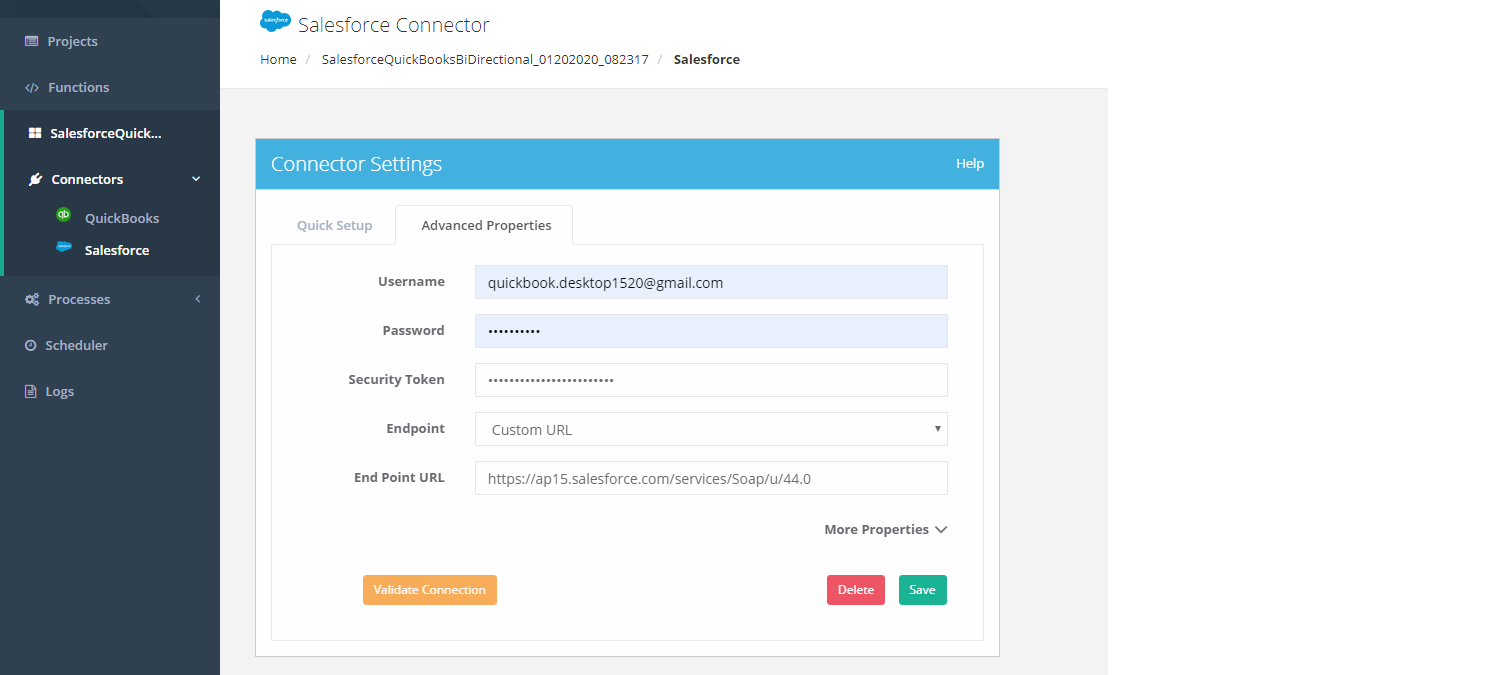
(https://developer.intuit.com/app/developer/qbdesktop/docs/get-started/get-started-with-quickbooks-web-connector#quickbooks-products-supported-by-web-connector) and install it. - Then click on Salesforce under Connectors, and go to Advanced properties.
- Fill details and click on Save Button.
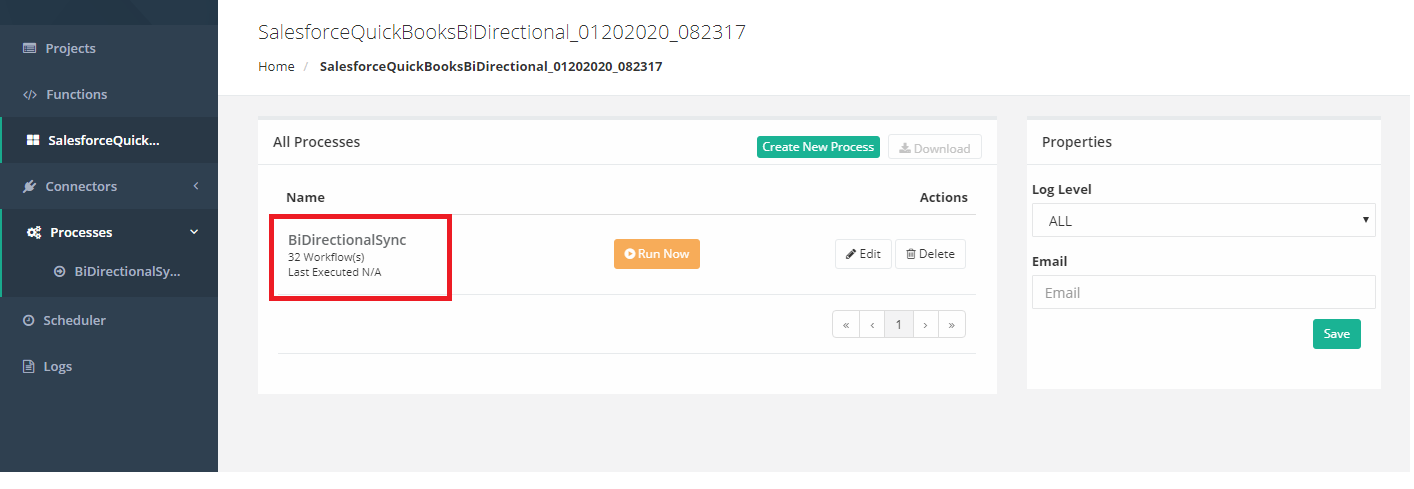
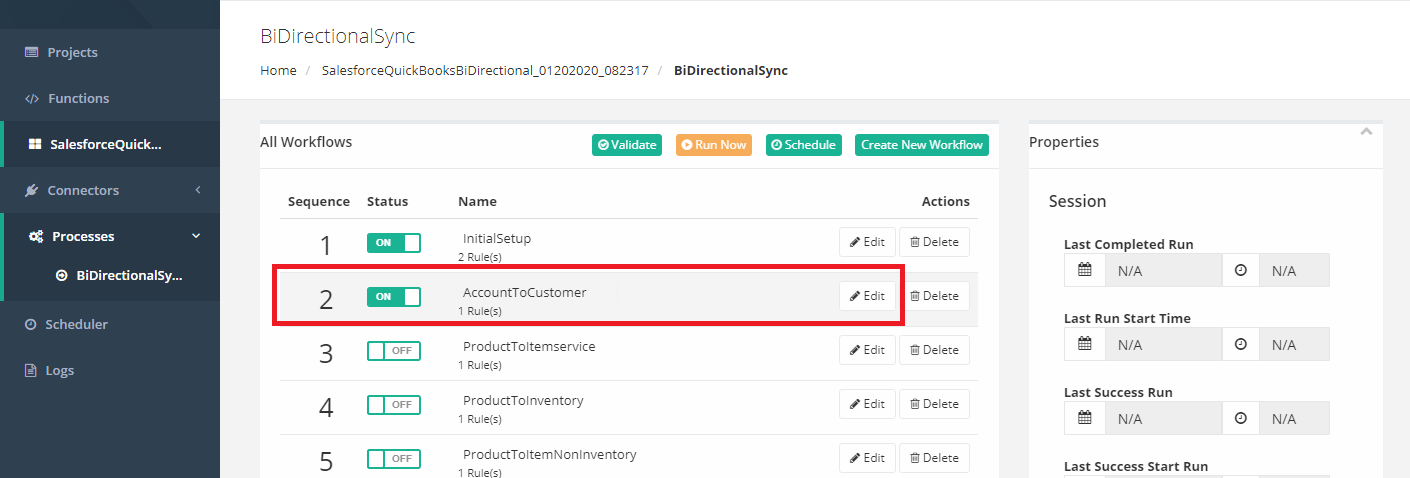
- Then, click on Processes under Connectors and click on BiDirectionalSync.
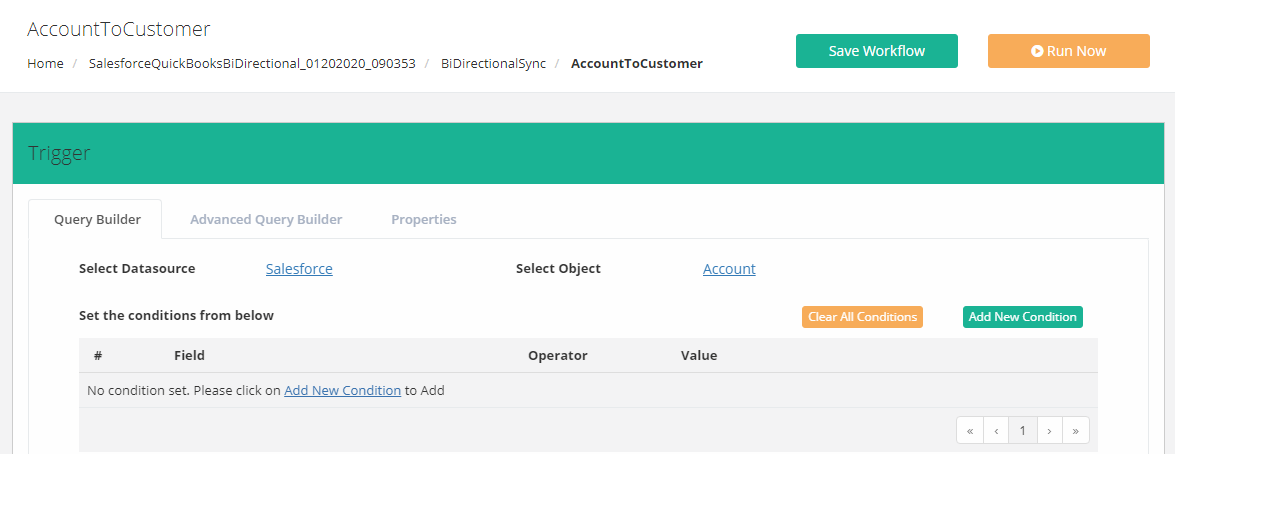
- Then, enable AccountToCustomer and click on Edit.
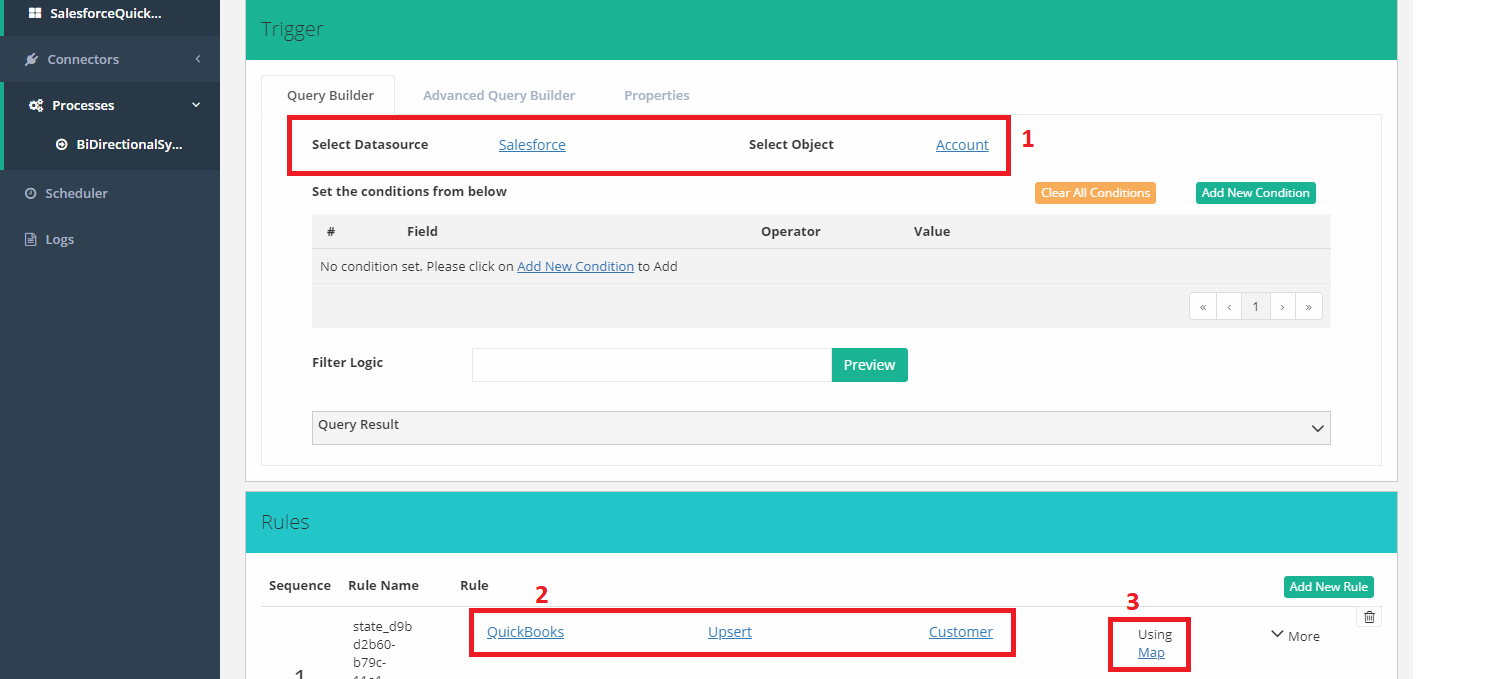
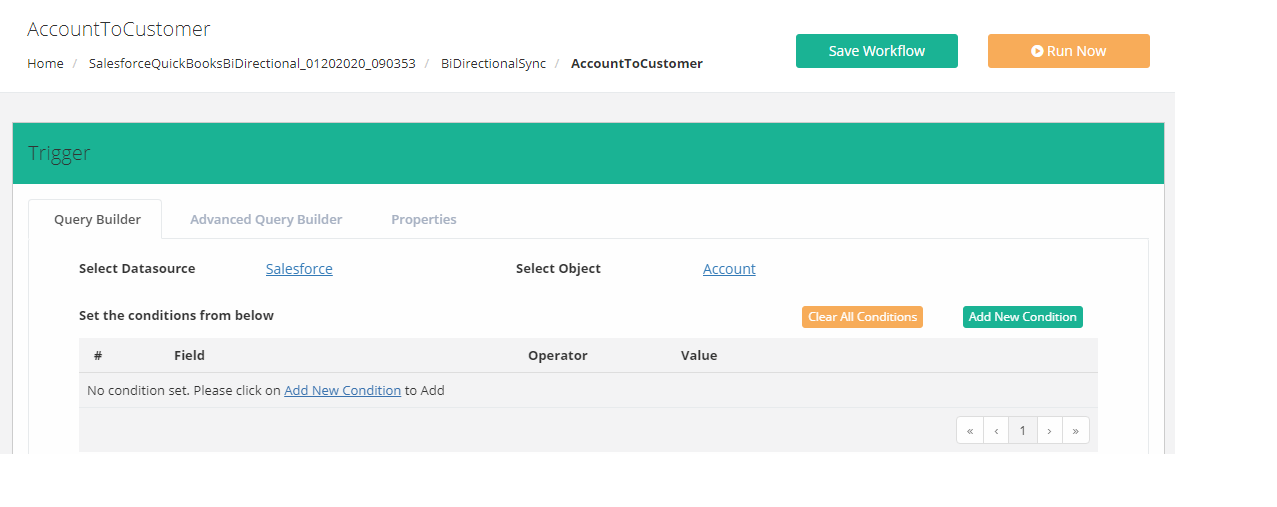
- Then, set Account(Object) as Datasource with Salesforce under Trigger panel and Customer with Quickbooks under Rules panel. Then click on Map.
- Then, set fields accordingly, and click on Save and Close.
- Then, click on Save Workflow.
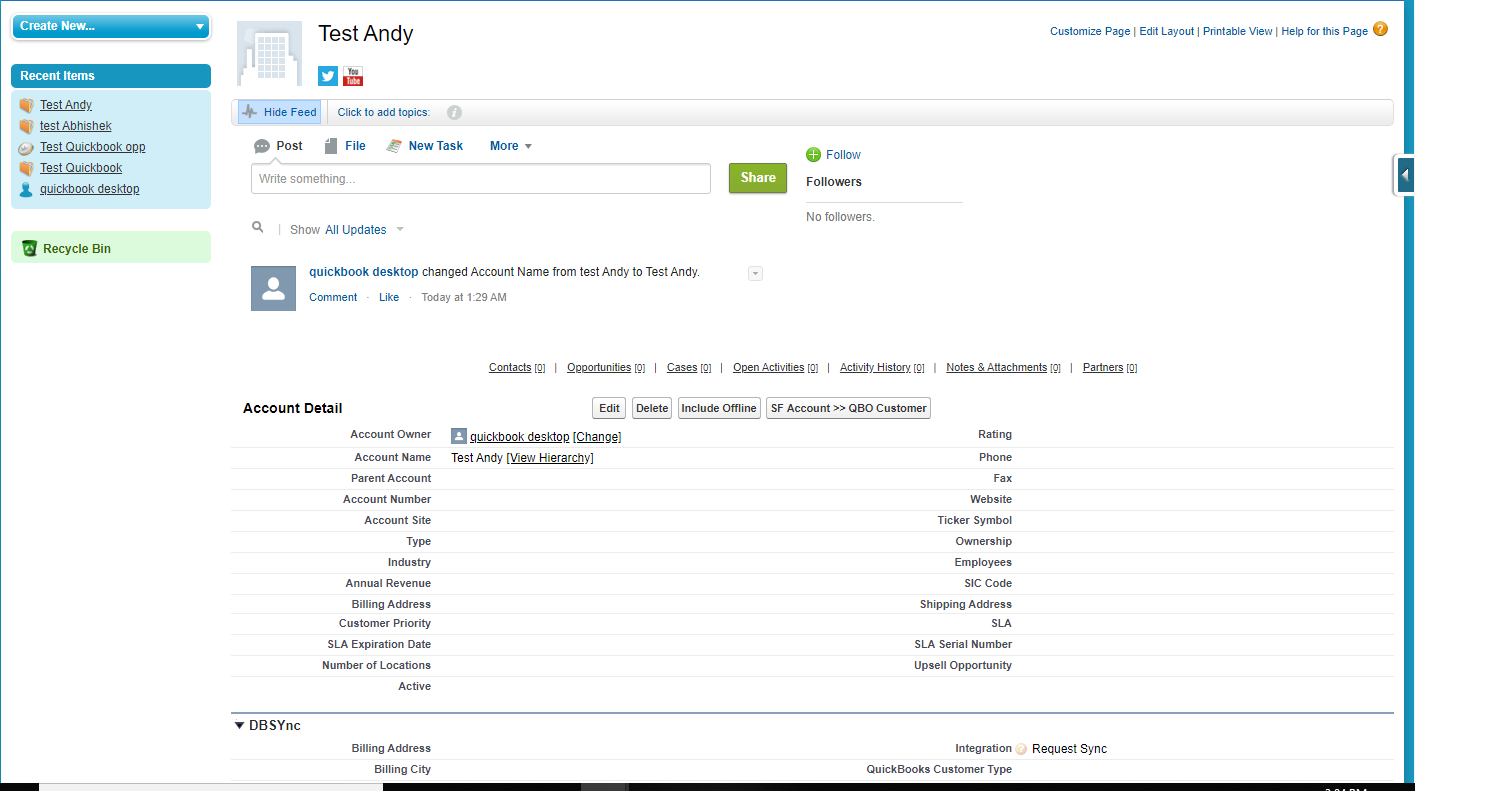
- Now go to Salesforce Org and create a new account. After that click on Edit layout and drag few Custom Fields( Integration, Quickbooks Id, ) and a Custom Button(SF Account >> QBO Customer). Then click on Save. Now go to the Integration field and select Request Sync and Save the Account.
- Then, from DBSync click on Run Now.
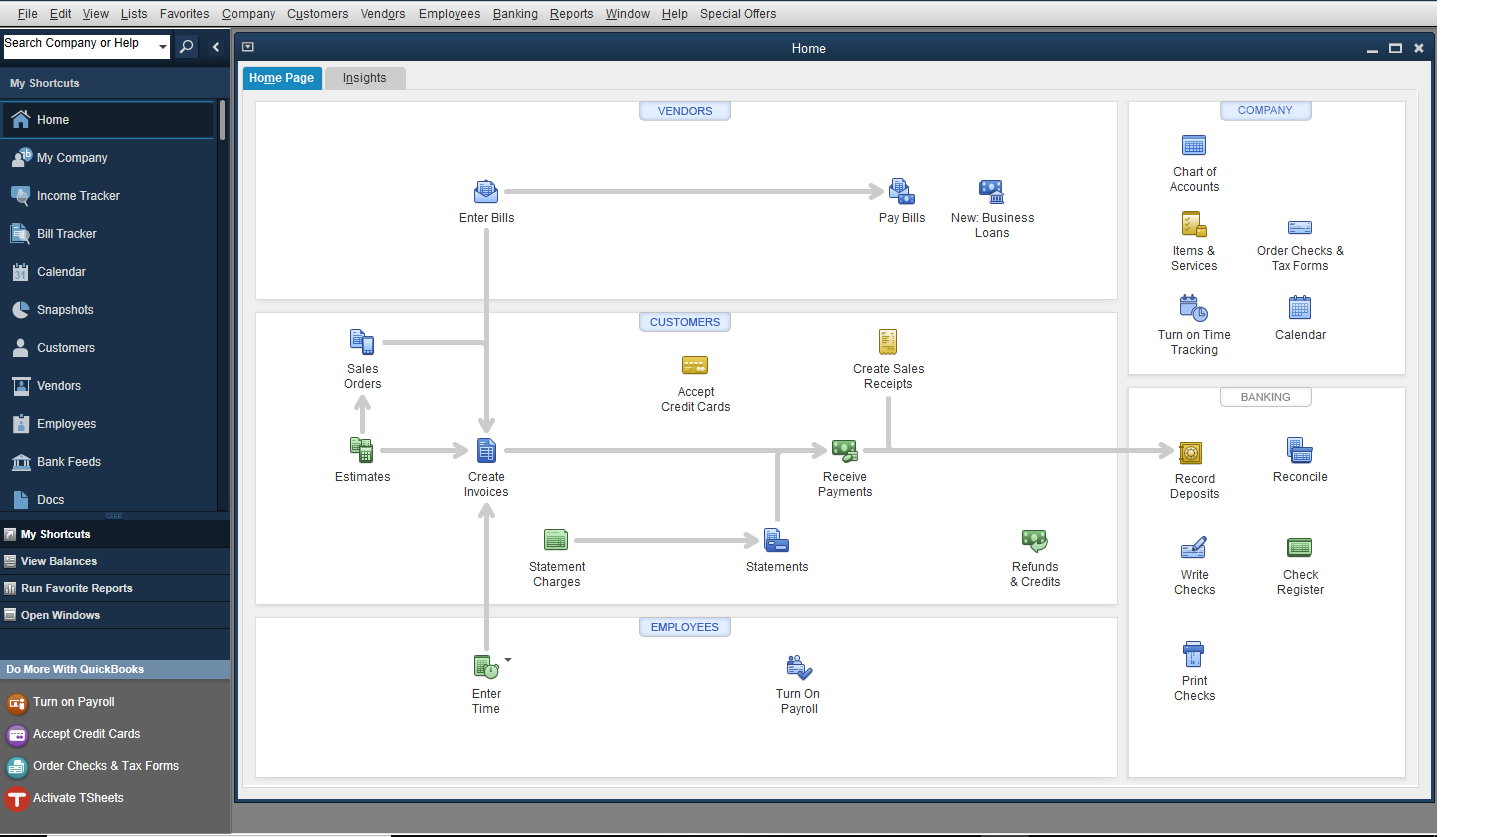
- Now go to Quickbooks Desktop.
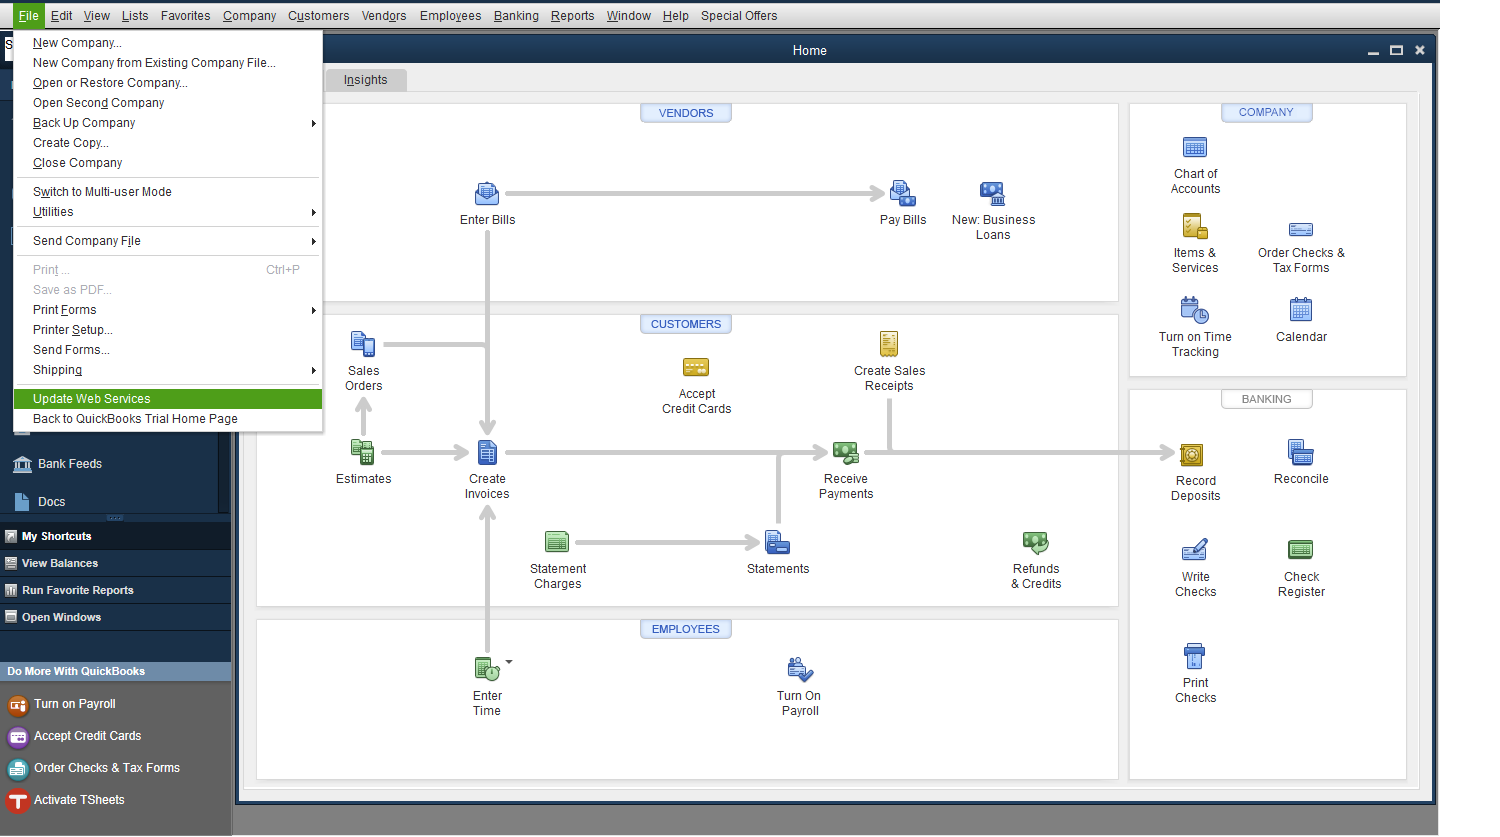
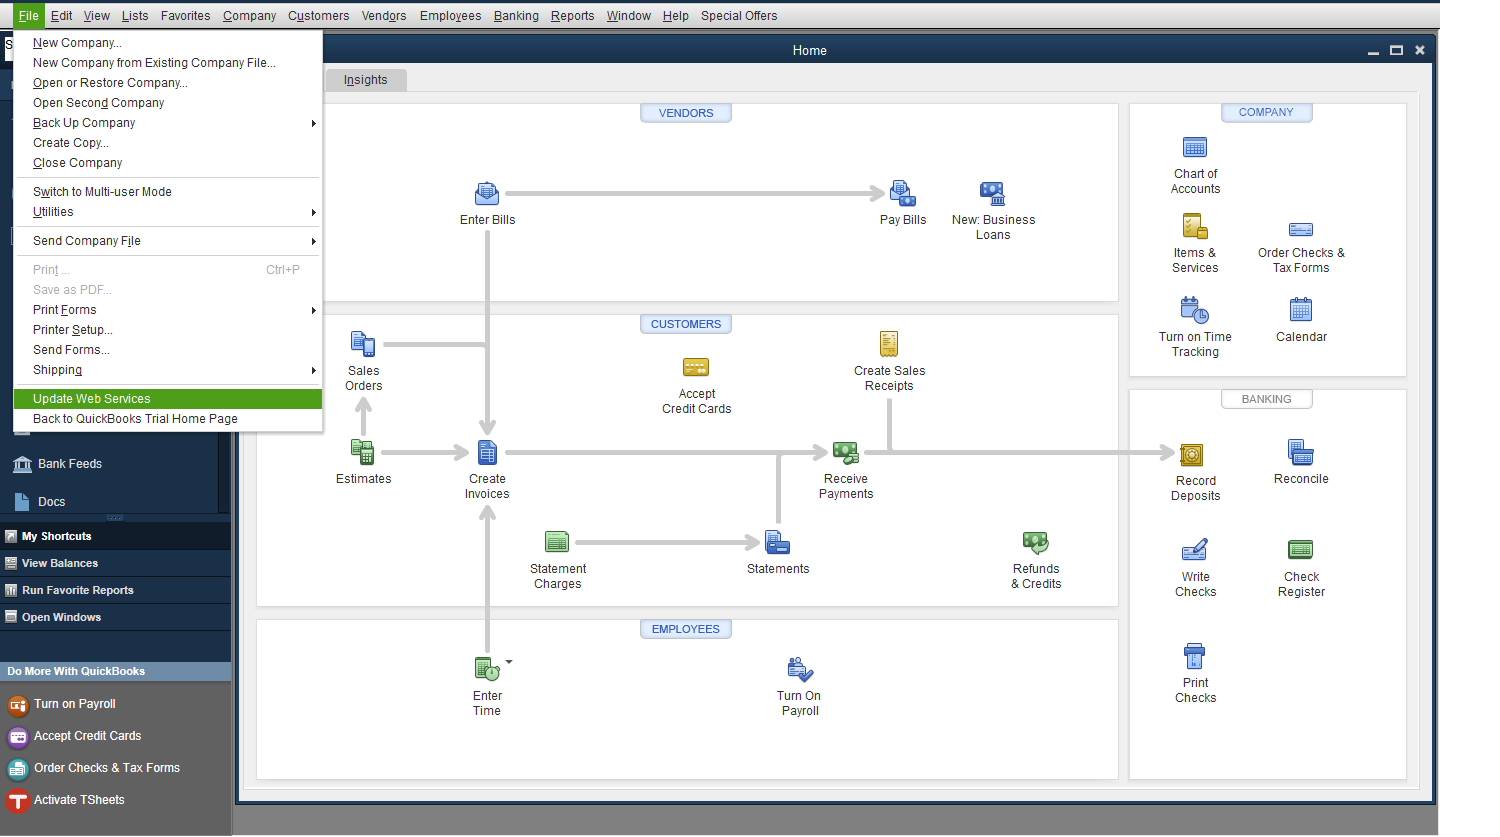
- Now go to Quickbooks Desktop → Click on File → Then, Update Web Services.
- Now go to Quickbook Desktop → Click on File → Then, Click on Update Web Services.
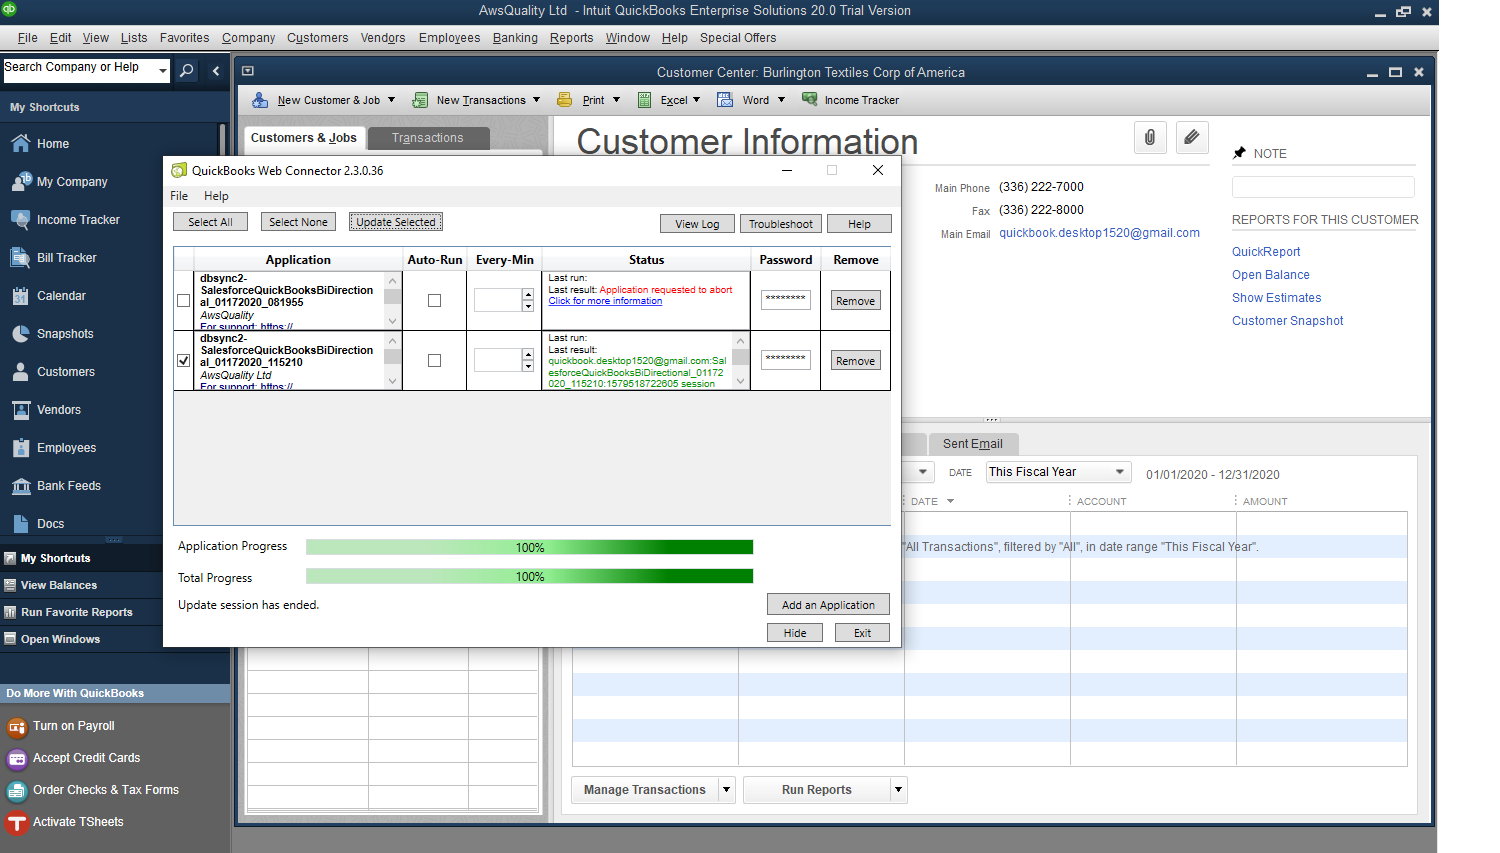
- Now click on Add An Application → Select a .qwc file which we have downloaded in Step 7 → Click on Update Selected → Wait for the process to get completed.
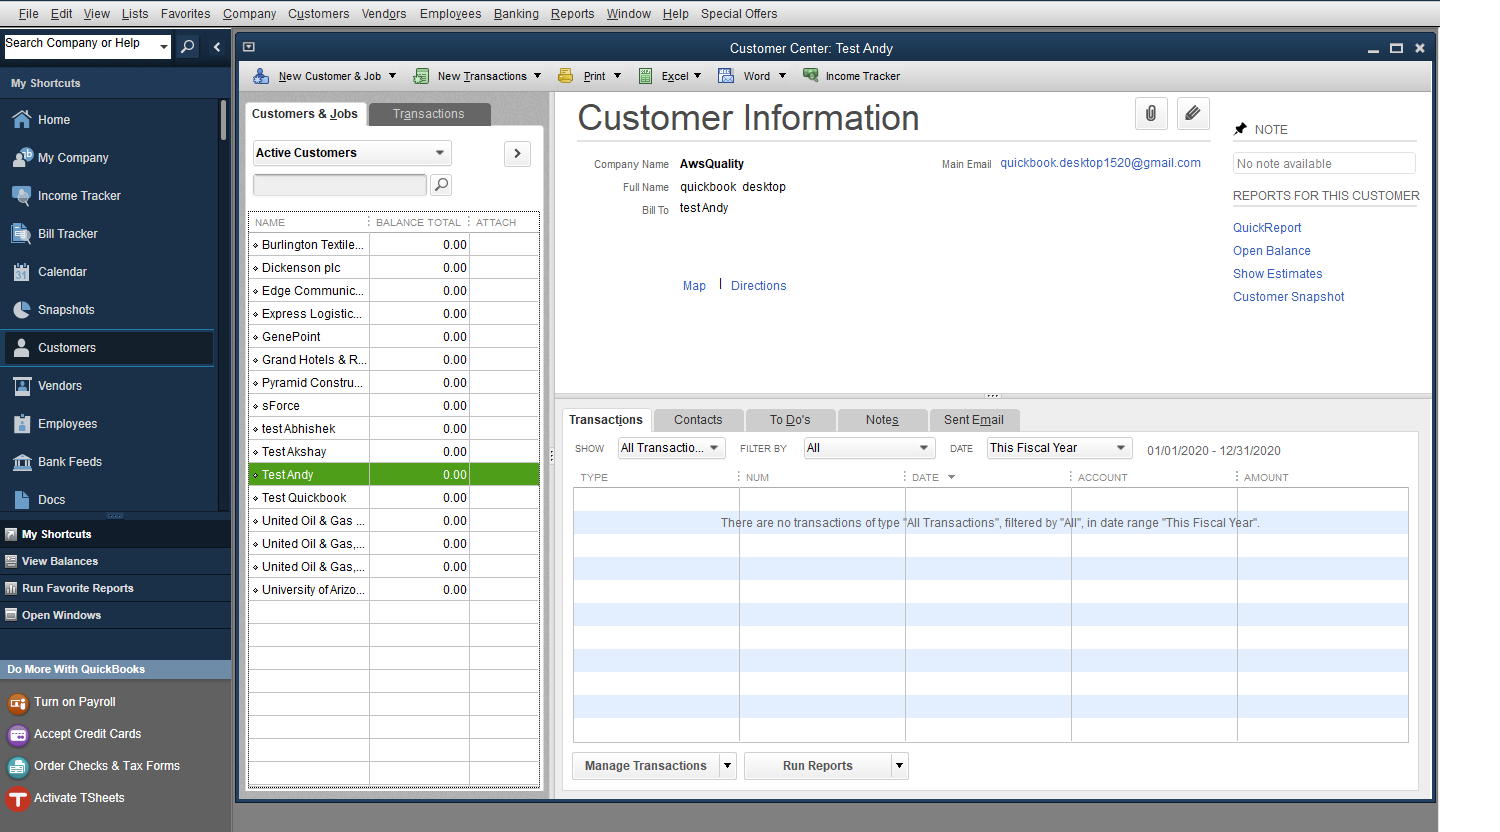
- Now as the processes are completed → Click on Customers → Check for the Account created on Salesforce here in Quickbooks as Customer.



We can configure this for other selections also like:-
- Salesforce Account/Contact to QuickBooks Desktop Customer/Contact
- Salesforce Opportunity Name to QuickBooks Desktop Job Name
- Salesforce Opportunity & Product Name to QuickBooks Desktop Invoice & Line Item
- Salesforce Opportunity & Product Name to QuickBooks Desktop Sales Receipts & Line Item
- Salesforce Product Name to QuickBooks Desktop Items
- QuickBooks Desktop Payment on Invoice to Salesforce DBSync Invoice.
If you facing any issue regarding this topic, so don’t hesitate to contact our salesforce integration consultants and get a free quote.
