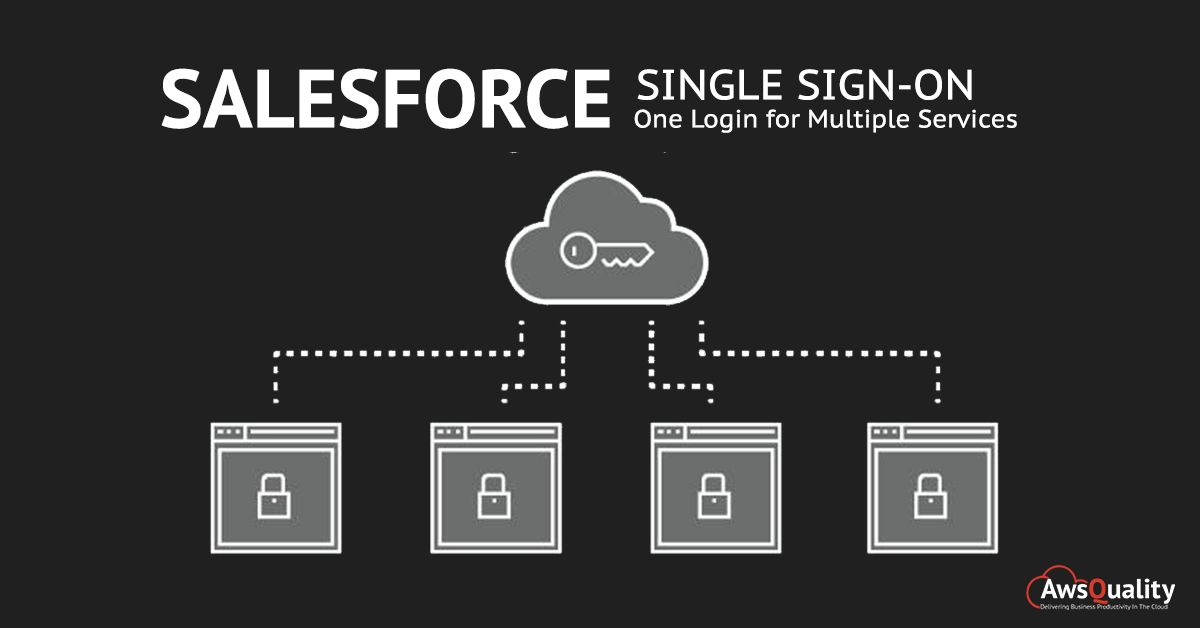
In today’s scenario, an organization has a different number of systems, applications and resources that are to be accessed by every user. In order to access all resources, applications and services, users must have to login to the application with their username and password separately and If they have to access more resources then it will be difficult to remember all of those login credentials. To eliminate such types of issues, Salesforce Single Sign On (SSO) is preferred to eliminate the above mentioned problems.
Salesforce SSO or Salesforce Single Sign On allows all users to access all authorized applications from single login credentials based on configuration of all apps within a single Salesforce environment.
Also Check: How to Integrate Salesforce and Outlook within Few Simple Steps
Benefits of Salesforce SSO
- Have to manage fewer passwords that allows system admin to receive fewer requests to reset forgotten passwords.
- Many companies use a central database to manage user identities in which if users are removed from the database they are no longer authorized to sign-in in any of the applications related to organizations. Therefore this Salesforce SSO system eliminates the database requirement and hence reduces cost to setup infrastructure.
- Save lots of time because users consume 5 to 20 seconds minimum time to log in to an online application or it may take longer if they wrongly type their username or password and again have to re-enter. But Salesforce SSO reduces this kind of frustration to login individually and hence add up to increased productivity.
About SAML
Security Assertion Markup Language (SAML), an XML-based standard which allows you to communicate between one service and another service in order to fulfil authentication decisions.
To set up Single sign on between two Salesforce Org (Organization) we need to set up one Salesforce Org. as Service Provider and another one as Identity provider.
Identify Provider (IDP) :- An identity provider is a trusted provider that lets you use single sign-on (SSO) to access other websites.
Service Provider (SP):- A service provider is a website which is used to host apps in order to access it.
Configuring Salesforce single sign on: Here we will explain SSO between two Salesforce org.
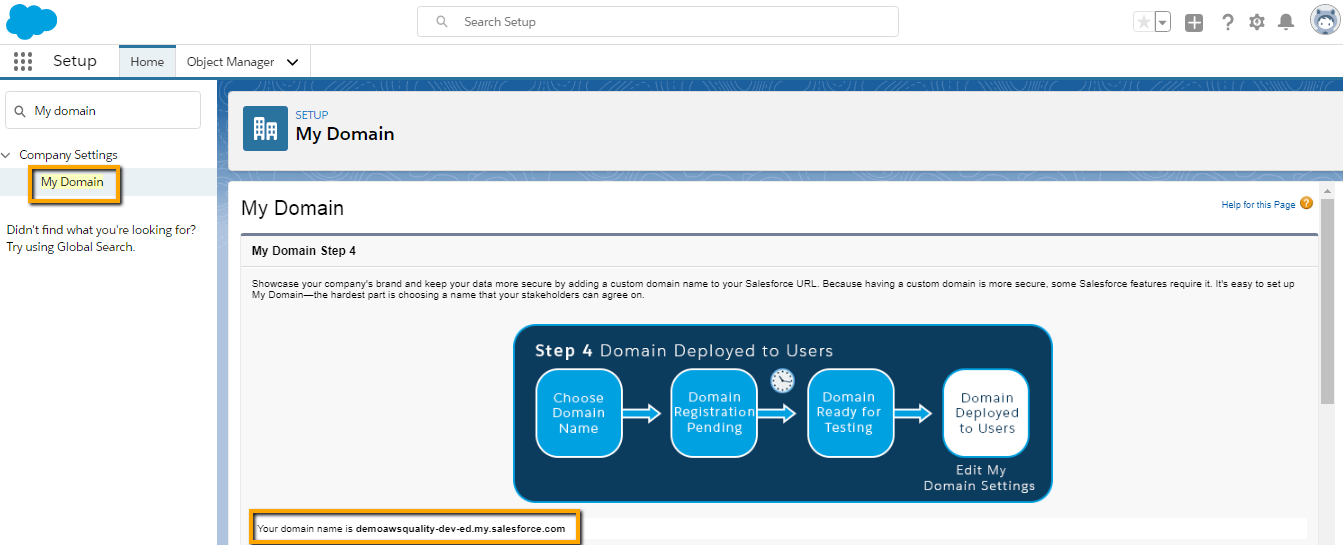
Enable my domain for both IDP and SP org.
- Type My Domain in a quick find box.
- Give proper domain names.
- Deploy this domain for all your users.
Enable the Identity Provider in your IDP Org
- Login to your IDP org.
- Type Identity Provider in the quick find box and select it.
- Since we are using the latest version of developer org. then identity provider is by-default activated.
- If you are using the older version then you have to first enable this and create the Certificate.
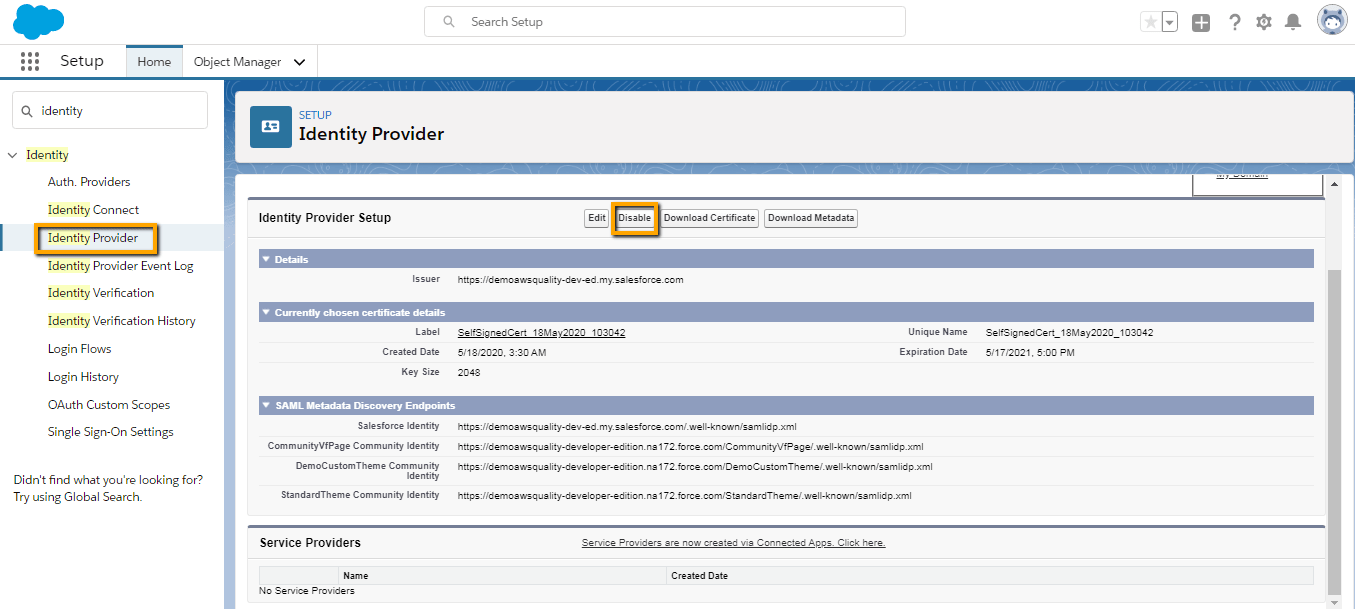
Note: Copy Salesforce Identity endpoint URL that will be used in further steps.
Add Remote Site setting in SP Org
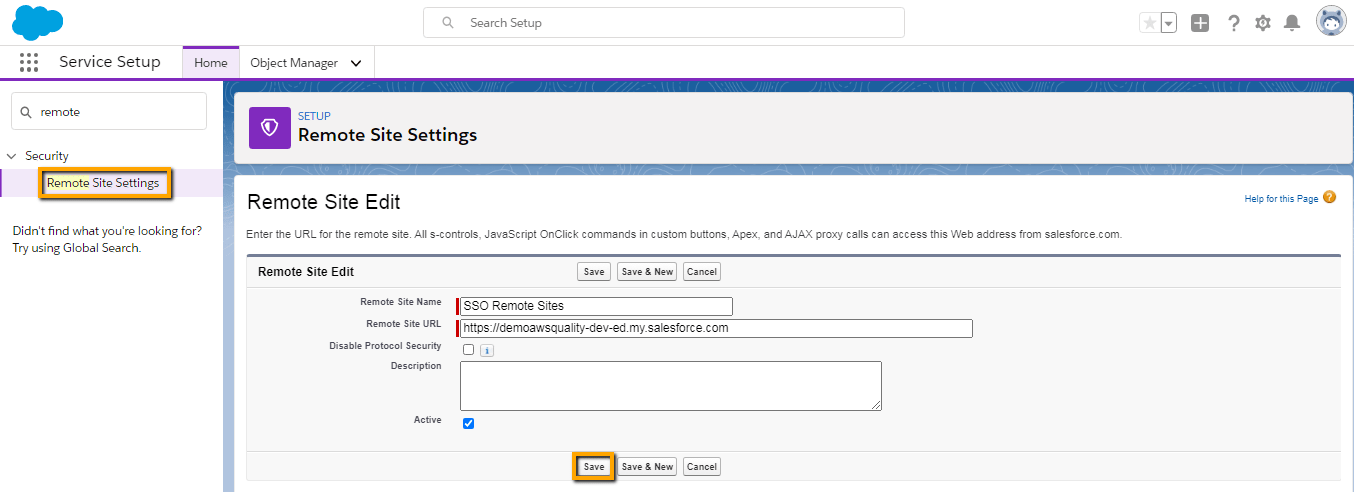
Now login to your SP org and add your Identity provider domain URL in SP org that is shown in below image.
- Setup -> Security -> Remote Site Setting.
- Click on Save.
Enable Single Sign On in SP Org
- Go to Setup >> Identity >> Single Sign-On Settings” and check the “SAML Enabled” option.

- Now provide SAML Single Sign on Setting detail. You can also download the certificate from above mentioned steps with the download certificate button and upload here with the “New from Metadata file” button. But here we will use New from Metadata URL here. Now we will use the same URL which we coped in above step.

- Paste the copied url that has been noted in the above step.
- Don’t do any change in the screen below. There should be one change that is to change SAML Identity Type as Federation ID.
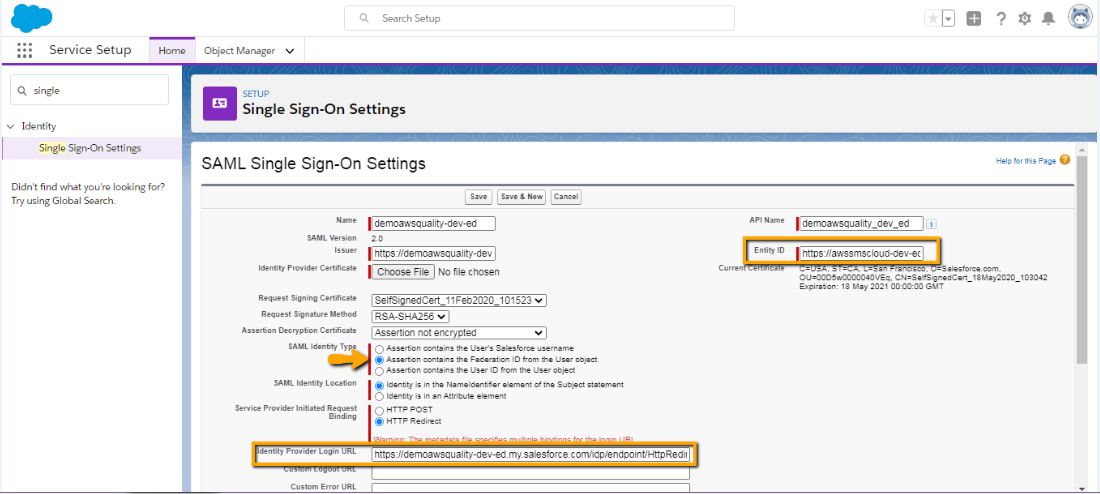
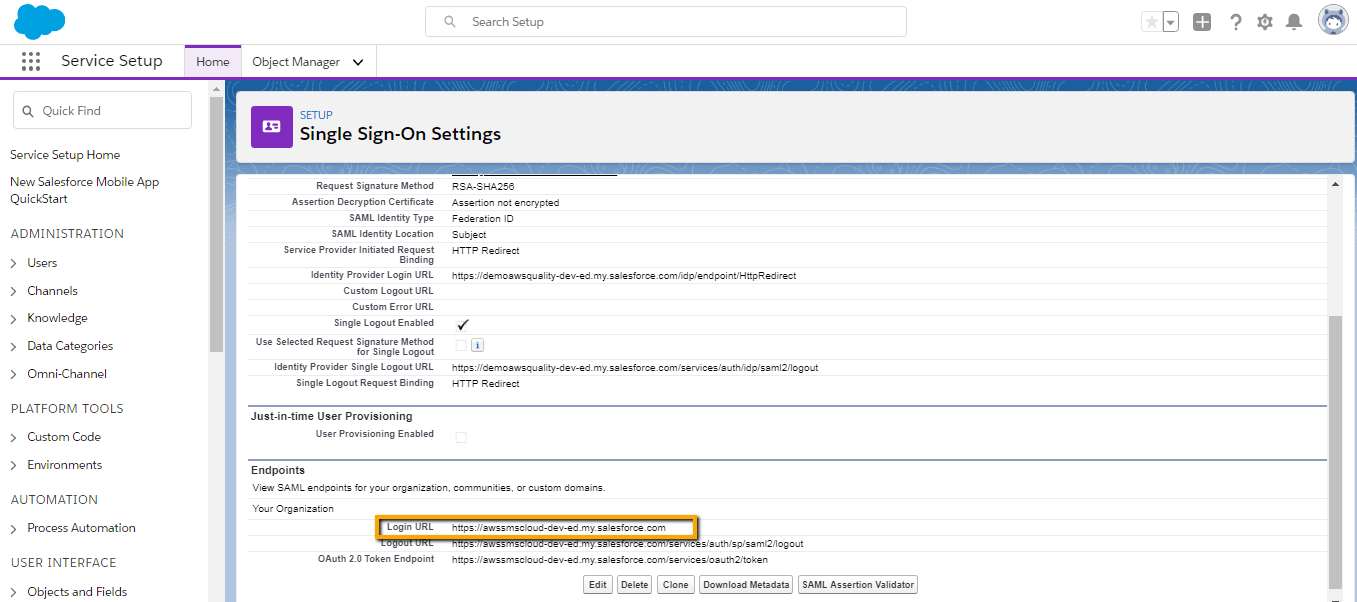
Note : Make a note of Entity ID and Login URL (shown in below image) from here. We will use the same in IDP org Connected App.
Create Connected App in IDP Org
Now go back in your IDP org. and create one connected app with below step
- Create connected app, Setup >> App Manager >> New Connected App.
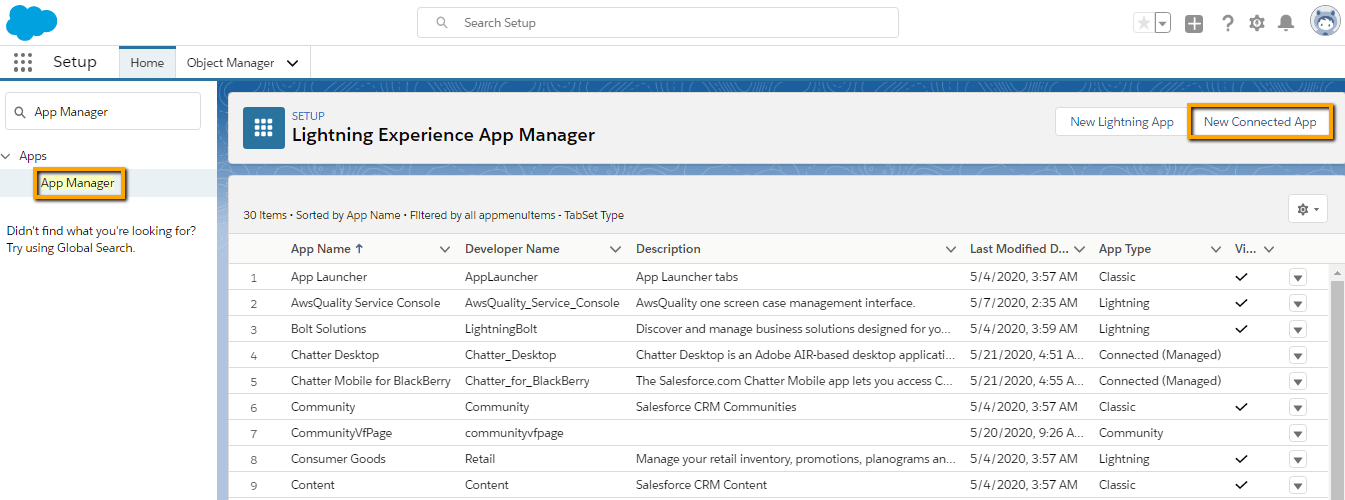
- Now provide all required detail and make sure that in the connected App we have to perform below mentioned steps…
- Enable SAML
- Provide Entity Id (Use Entity ID from above steps mentioned in Note)
- ACS URL (Login URL from above step)
- Subject type should be Federation Id.
- IDP Certificate as Identity Provider Label name
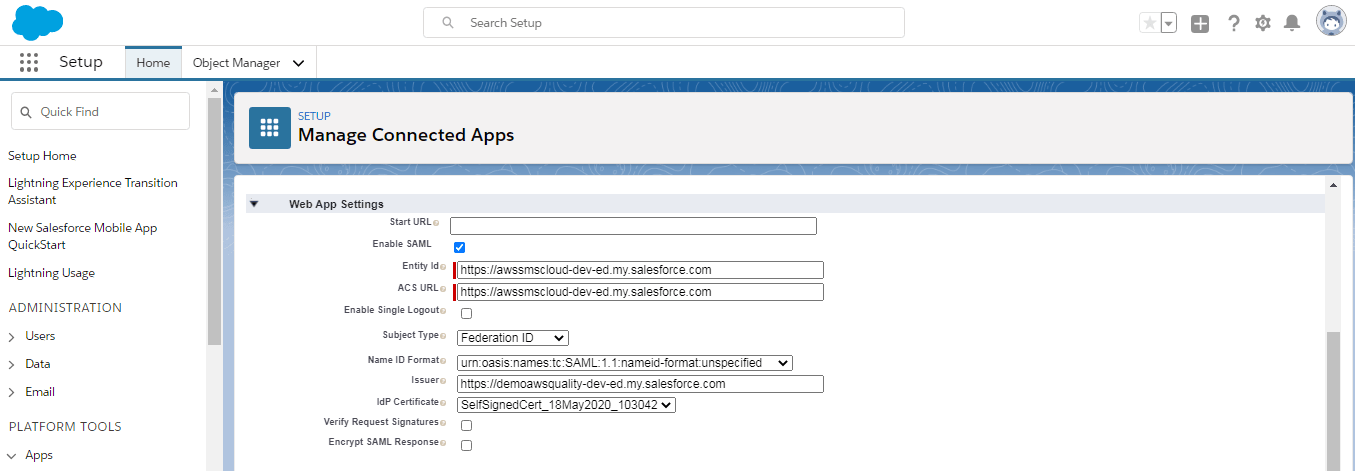
-
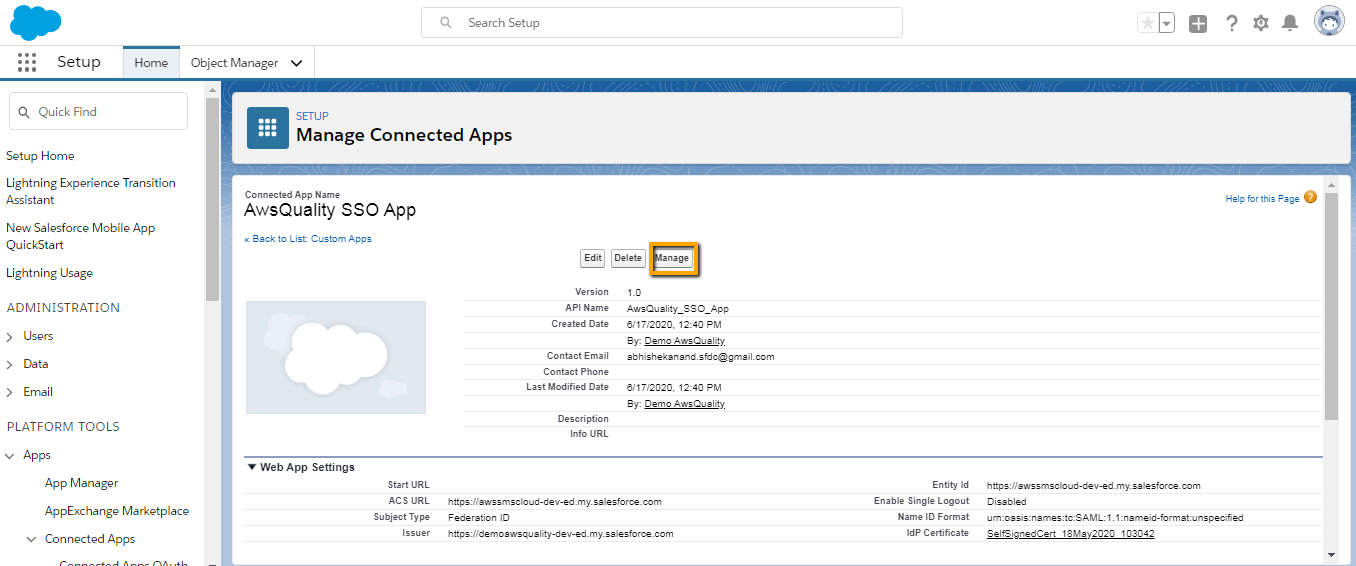
- Now once the Connected app is ready. Click on Manage Button. Then Add the profile from the related list.
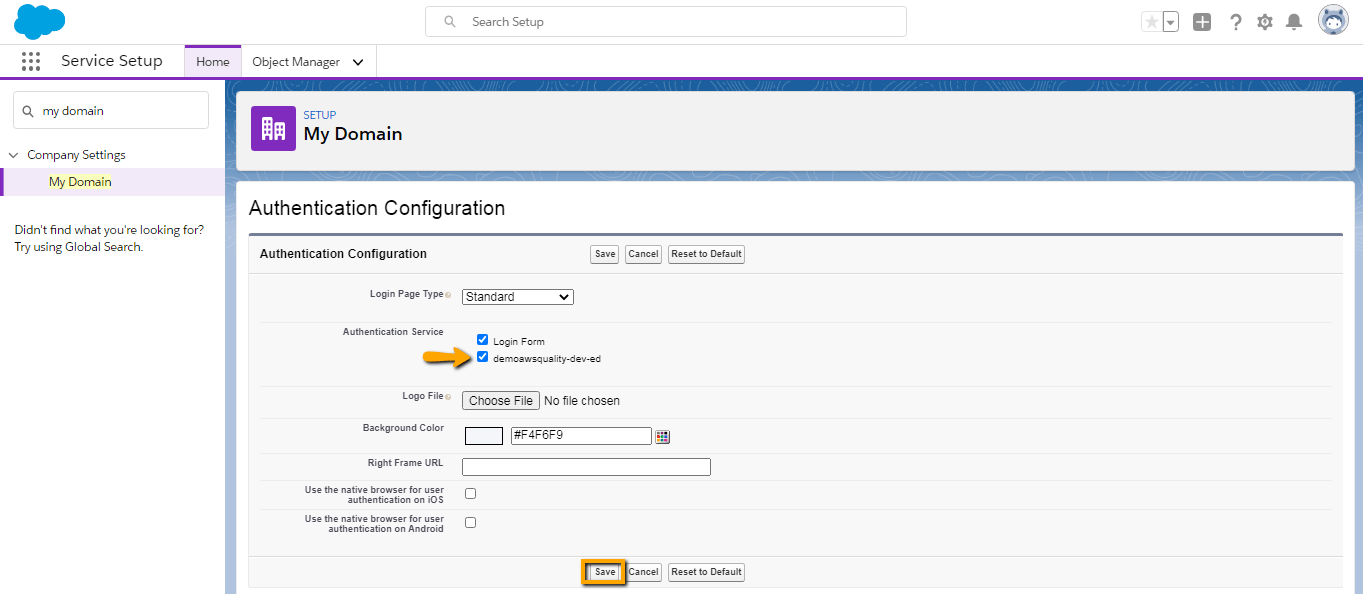
Updating Authentication Configuration for my Domain in SP Org
- Now go to SP org and navigate to My Domain (Setup >> My Domain).
- You have to edit the Authentication configuration setting.
- Select the IDP org in Authentication service.
Testing your configuration
- Create one user in both orgs with the same “Federation ID”.
- Then first login into Identity provider org. Then go to your connected app >> Click on Manage .
- Then click on “IdP-Initiated Login URL” URL to check your Single sign on.
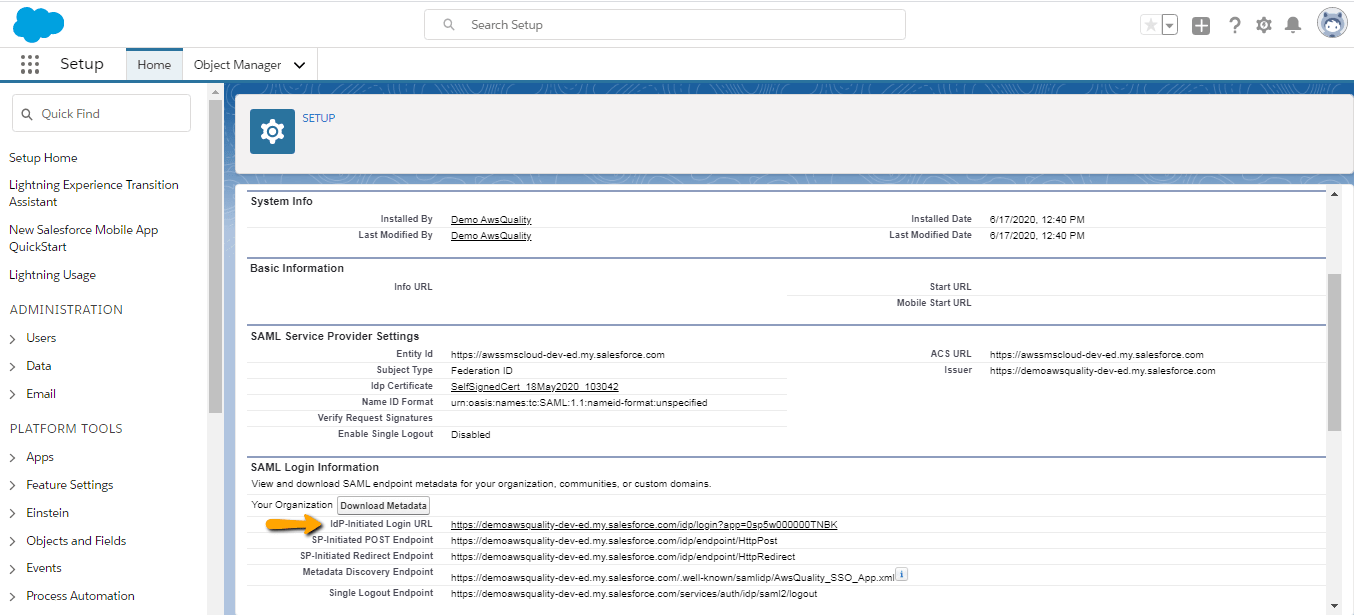
- Now after clicking on this link you are able to login into a different org that is SP org now you have access to the SP org.
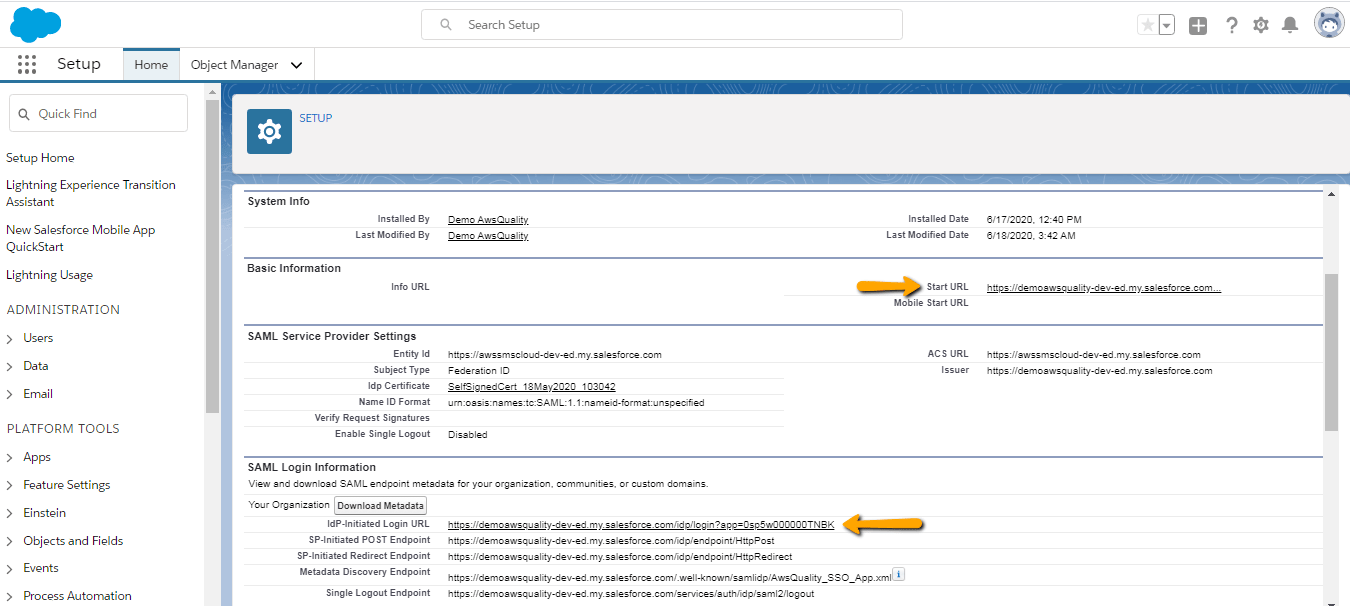
- But if you want to add an app in app App Launcher then have to edit your connected app and copy your IdP-Initiated Login URL (shown in just above image) and paste in Start URL ( shown in below image).
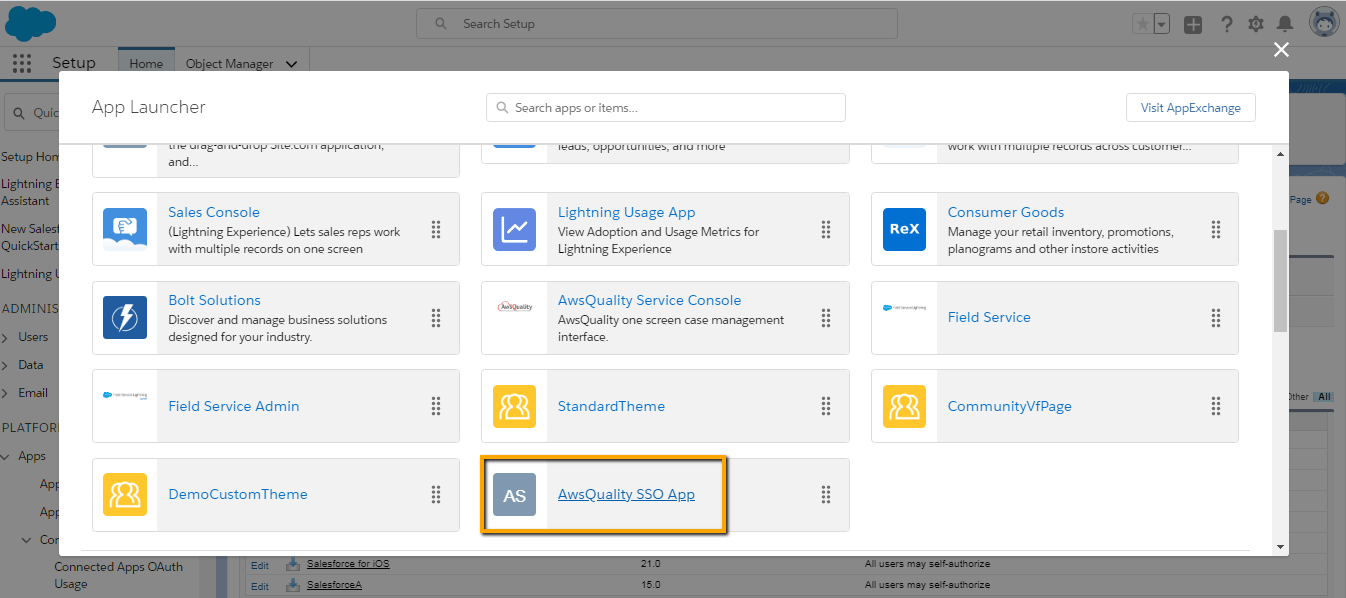
- Now go to the app launcher you can see the recently created SSO app in IDP org. Click on it to get login into SP org.
Conclusion
Salesforce Single Sign On saves lots of time by providing a single platform to access two different organizations so that sales representatives simply click on a particular application and are able to login into another org. and can maintain the data in that org. also. They do not require to login individually so remembering lots of username and passwords tasks can be eliminated easily.
