When you establish a connection from one Salesforce organization to another, then at that moment you are able to share records to others and at the same moment, others are able to update data.
Here is full control on the type of records that you share to your connected organizations by selecting which objects and fields to publish to the connected org.
Your connected organizations don’t have direct access to records that you are planning to share. Once you shared from your end then and then only it will be visible to your connected org.
Requirements:
Available in: Salesforce Classic
Available in: Contact Manager, Group, Professional, Enterprise, Performance, Unlimited, and Developer Editions
USER PERMISSIONS NEEDED — Modify All Data
Also Check: Salesforce Launches Revenue Cloud to Speed up Revenue Growth
Here we will discuss some of the important steps to Configure in your organization…
- Make sure that after enabling Salesforce to Salesforce, you can’t disable it. However, you can control which data you share and with whom you want to share it.
- From Setup, enter Salesforce to Salesforce Settings in the Quick Find box, then select Salesforce to Salesforce Settings.
- Click Edit.
- Select Enable.
- Click Save.
We need the Two Salesforce Organizations, to be used to share the records from One Organization to another.
One is Provider and another one is Consumer.

- (Provider) Create an Account Record and a Contact Record.
- Create an Account Record with the required field values.
- Create a Related Contact Record, We need to specify the Consumer Organization’s Email Id inside the Contact Record’s Email field.
- Send the Invitation to the Consumer and Map the Connection between the organizations.
- Provider: Send the Invitation Request.
-
- For this, you have to access Connection Tab.
- Click on the “Connections” tab.
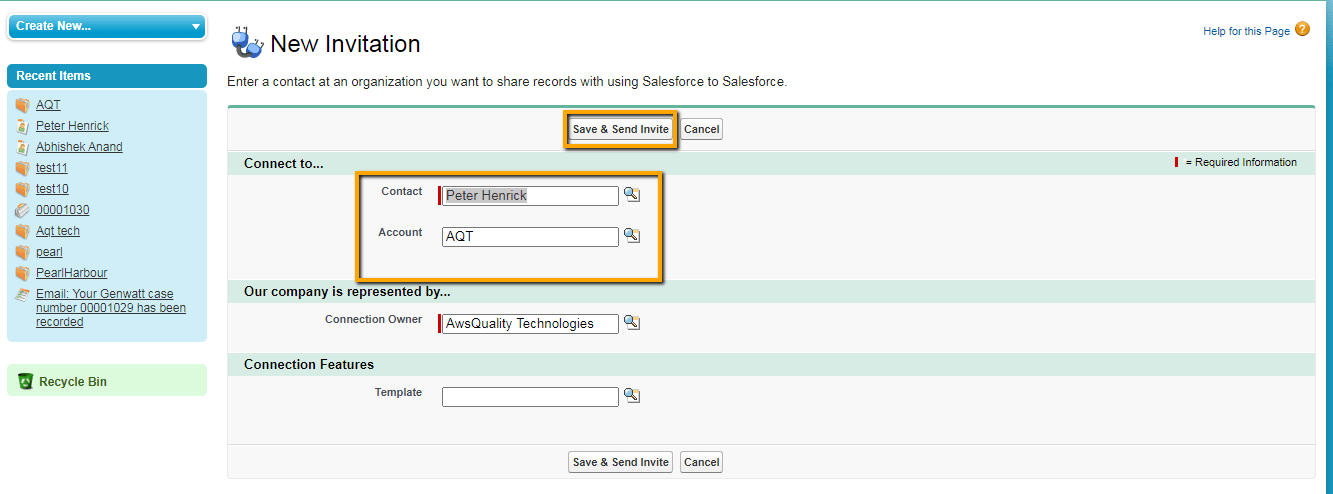
- Click on the “New” button, to add a New Connection Request to be sent to the Consumer.
- Select the ” Account Record” just by accessing the “Lookup” icon.
- Select the ” Contact Record” just by using the “Lookup” icon.
- Click on the “Save & Send Invite” button.

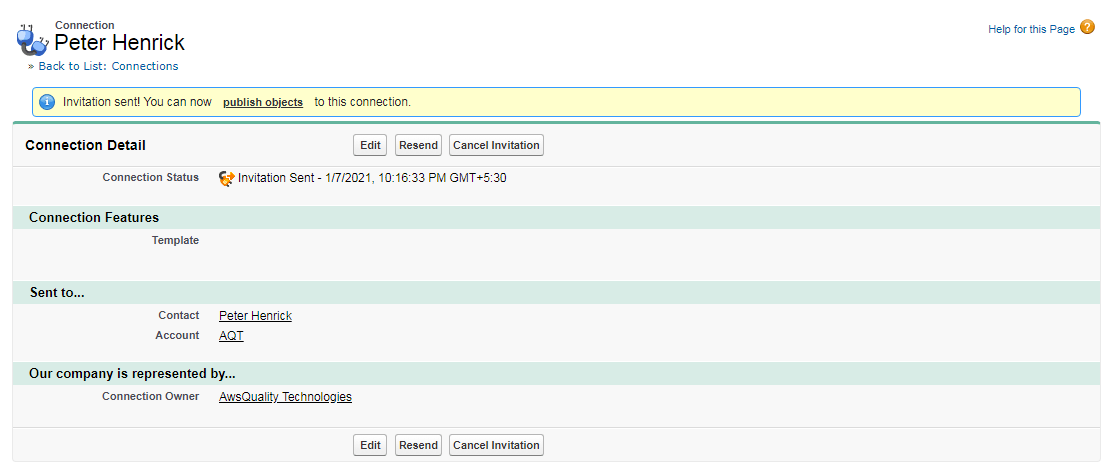
- Consumer Organization Should Accept the Invitation.
- Goto the “Consumer Organization’s Email ID” and open the Email.
- Copy the Invitation Request.
- Open in another browser.
- Enter the Credentials of the Consumer Organization.
- Click on the “Accept” button.

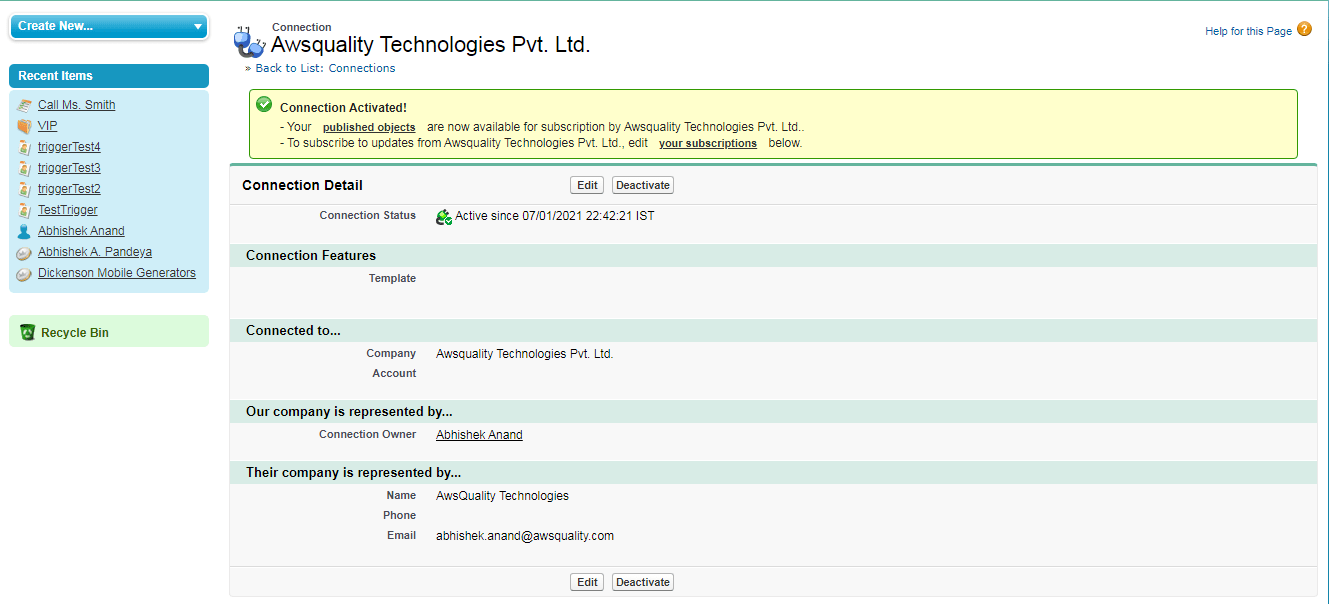
- (Provider) Select the Required objects to be get Published from Provider to Consumer.
- Goto the “Published Objects” section.
- Select the Required Objects to be published.
- (Ex: Account, Contact)
- Click on the “Save” button.

- (Consumer) Subscribe to the Objects provided by the Provider.
- Goto the Consumer Organization.
- Click on the “Connections” tab.
- Open the Connection link established by the provider.
- Goto the “Subscribed Objects” section.
- Click on the “Subscribed/Unsubscribed” button.
- Map the Object from Provider to Consumer.
- Select the Checkbox “Auto-Accept”.
- Click on the “Save” button.

- (Provider) Select the Required Fields to be get Published from each object, which has been published to the Consumer.
- Go to the “Connections Tab” and click on it.
- Open the Connection Link has been established.
- Go to the Published Objects Section.
- Click on the “Edit” link for the Published Object (Ex: Account)
- Select the required fields to be get Published, by selecting the Checkbox.
- Select the Checkbox “Send the Invitation Email”.
- Select the Checkbox “Send the Related Child Records Also”.

- (Consumer) We need to Subscribe the Published Fields in each object, and we have to Map the Fields with our local object fields.
- Goto the “Connections Tab” and click on it.
- Open the Connection Link has been established.
- Goto the “Subscribed Objects” Section.
- Click on the “Edit” link for each Subscribed object.
- Map the Fields from Source(Provider) To Target(Consumer).

- (Provider) Share the Records to the Consumer by using the “External Sharing” button.
- Goto the “Published” Objects Tab (Ex: Account)
- Access the records.
- Edit the page layout for that.
- Select the option “Related List”.
- Add the related list “External Sharing” onto the Account Page Layout.
- Click on the “Save” button.
- (Provider) Share the Record to the Consumer.
- Click on “Accounts Tab”.
- Access the records that you want to share.
- Goto the “External Sharing” Related List.
- Click on the “External Sharing” button.
- Select the “Connection Name” from the Multi-Select Picklist.
- Click on the “Share” button.

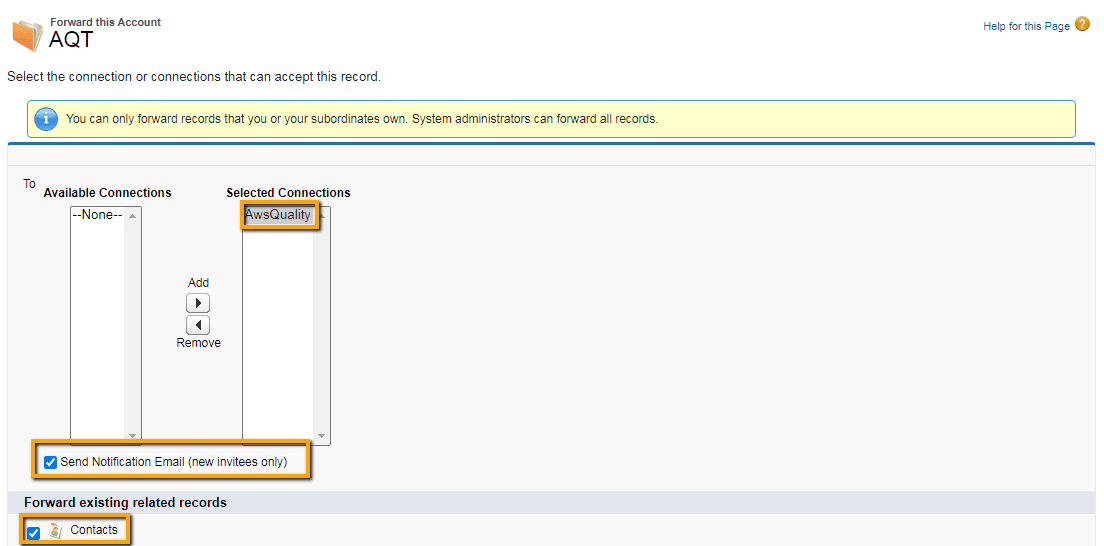
- Consumers will be able to view the record, and they can perform the operations on the records.
Some of the limitations…
- Available in Classic interface only.
- Have manual steps involved in order to share records with other organizations.
Advantages
- Sharing of records with a connected organization using Salesforce to Salesforce, you forward them or assign them to a queue. You can forward the same records to multiple connected organizations.
- Admin can also do this integration configuration because only the configuration of two organizations is involved.
- No need for any apex code to do integration between two organizations.
- With Salesforce to Salesforce, you can select which type of records you want to accept from a connected organization that shares them.
- With the help of Salesforce to Salesforce, if you accept any of the parent records that have been forwarded from a connected organization, then any of the related or child records sent with it are automatically accepted.


